Tebi guide for Cafes
Welcome to Tebi’s Cafe Guide! Follow our step-by-step process to set up your cafe.
Onboarding
If you haven’t signed up to Tebi yet, make sure to complete the Onboarding steps first. In short, this comes down to:
- creating a Tebi account for your cafe;
- setting-up Tebi payments so you can process your payments;
- and ordering your terminal and other hardware.
Log in to Tebi
Log in to Tebi: in the Back Office, Tebi App and on your terminals.
Set up your Prep Station
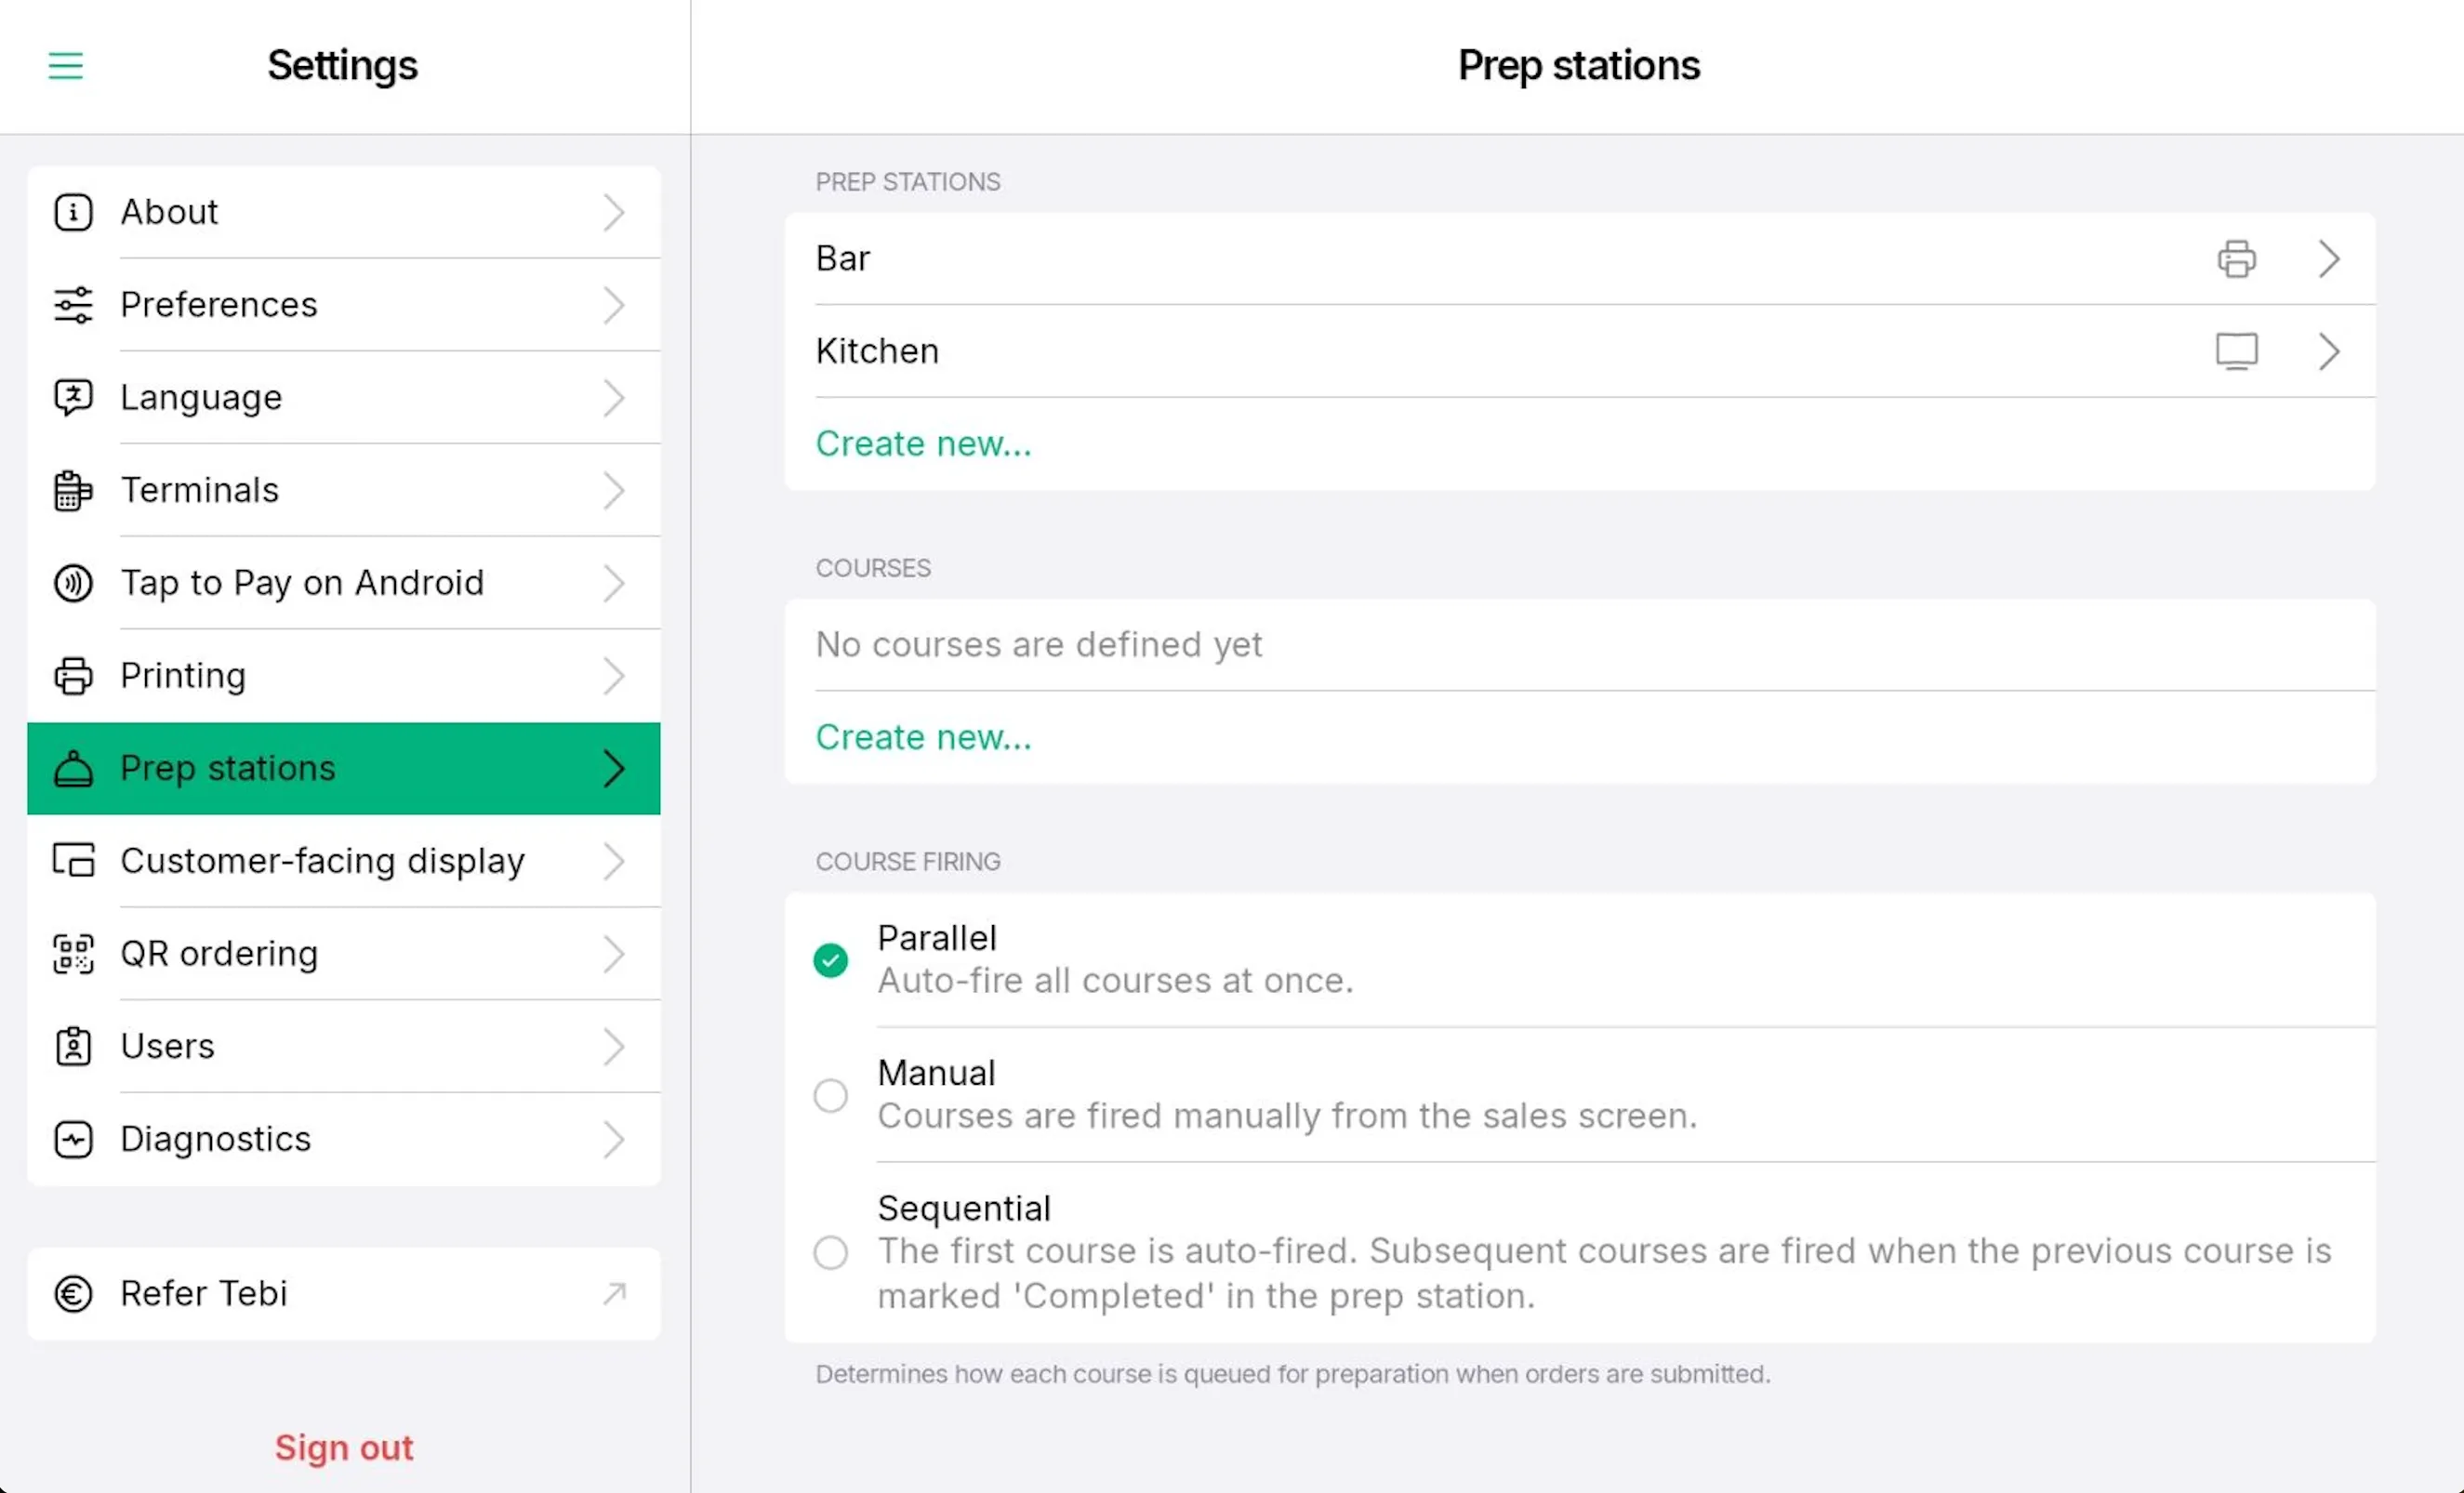
Start by adding a Prep Station for your cafe in the Tebi App. You can choose to set up a digital prep station or configure a printer to print prep order tickets. You can assign the Prep Station when creating a product.
Create your first product
To kickstart your sales with Tebi, you’ll need to add your first product in the App or Back Office, and what better way to start than with your signature coffee?
Use tags to organize products into groups on the Sale Screen, like ‘Coffees,’ ‘Sodas,’ or ‘Pastries.’ A product can have multiple tags.
Adding modifiers to your coffees
Add modifiers to customize orders and cater to customer preferences. Modifiers allow you to select different types of milk, add ice cubes to a lemonade, or select take-away packaging for coffee to-go. Modifier groups are added in the Back Office, not the App.
Let’s take cappuccinos as an example, with the option to choose different types of milk which come at an added cost. Start by creating separate products for each milk type (e.g. oat milk, soy milk and cow milk).
Now it’s time to create a product modifier group, which in this case would be ‘Milk’. You will add the modifiers (i.e. the different types of milks) and products that use the modifiers (i.e. coffees containing milk).
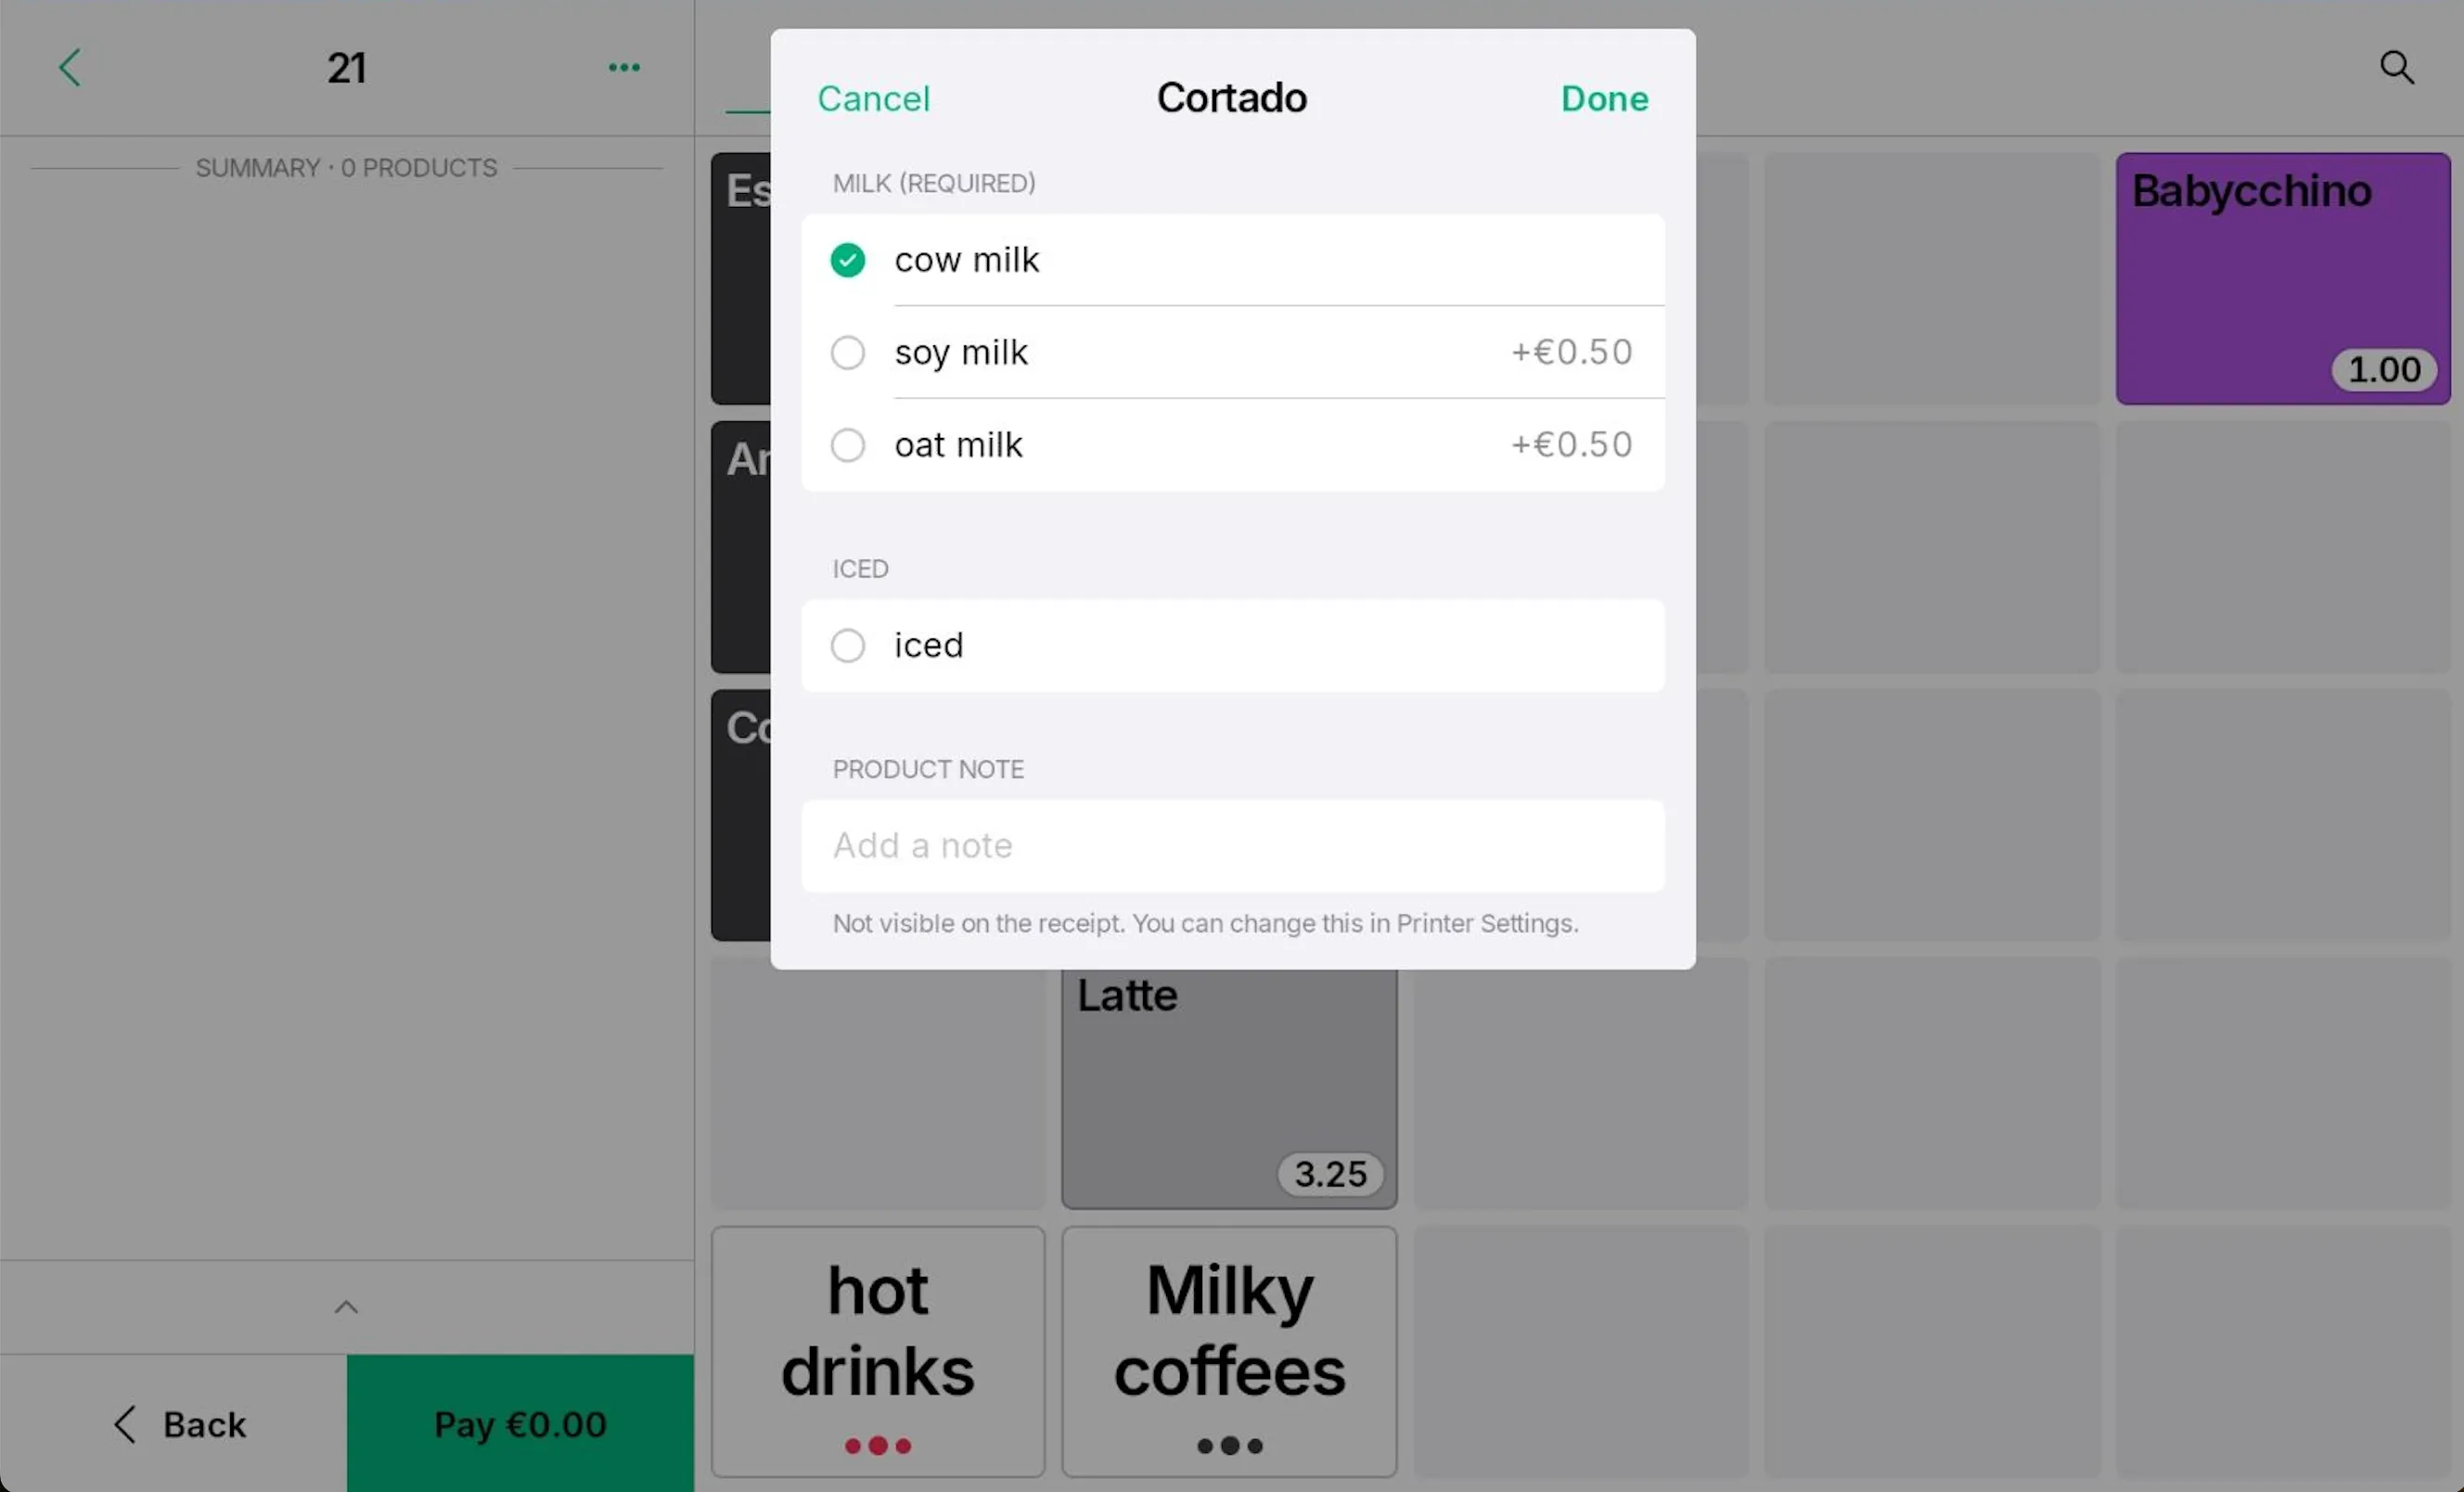
Another example of a modifier to add is whether or not the coffees are iced. This is a modifier without an extra cost, meaning it is a note modifier. Create a note modifier for iced coffee and include: ‘Iced’ as a note modifier to the tagged group ‘Coffees’ and any other products you want this to apply to.
Adding your product to the Sales Screen
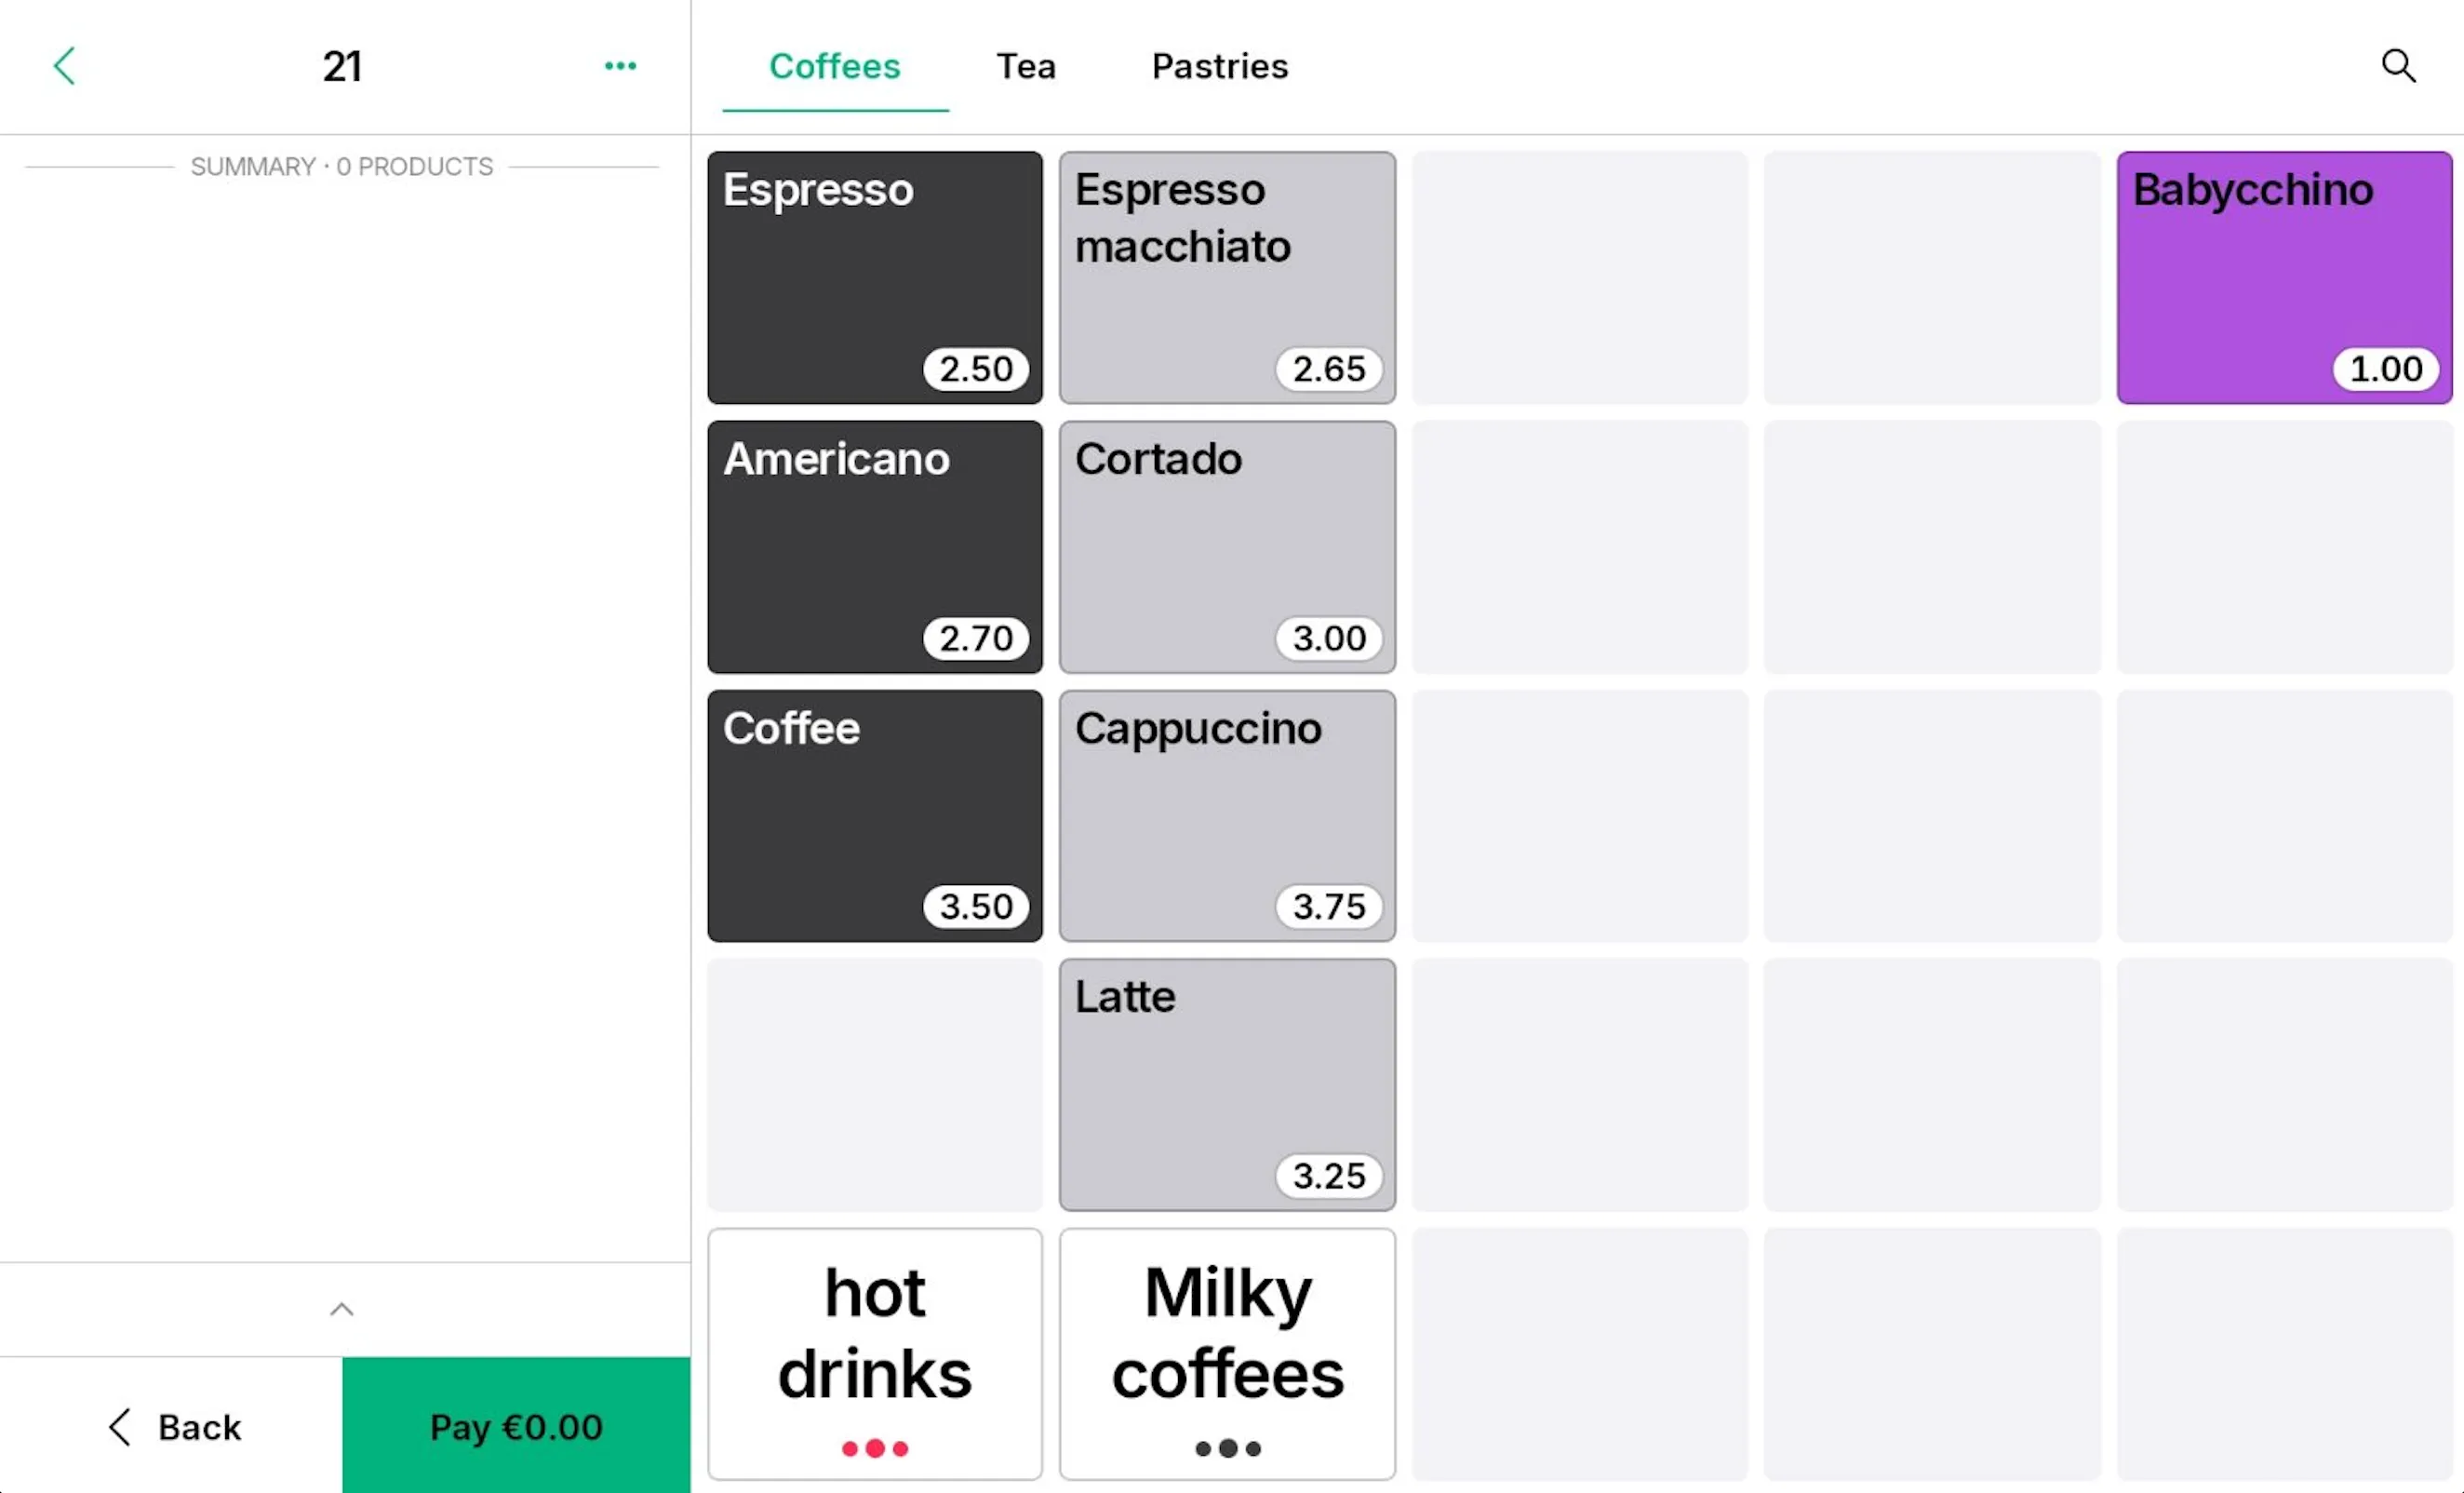
After creating your products and modifiers, add them to your Sales Screen so that your staff can easily select products when processing orders. Customize your Sales Screen however you like, e.g. with different tabs like ‘Drinks’ and ‘Food’, with tagged groups, and a variety of colors. Continue by adding your products to the Sale Screen.
In this example, the tagged group ‘Coffees’ is added to the Sale Screen, which includes the products ‘Cappuccino’, ‘Latte’, ‘Cortado’, ‘Espresso’, and ‘Coffee’. By tagging them as ‘Coffee’, they are grouped together. Clicking ‘Cappuccino’ lets you select modifiers like iced coffee and milk type.
Find out more about what you can do with Tebi Sales, like:
- how to add shortcuts to products with modifiers to the grid;
- how to create your first sale;
- adding discounts;
- setting up and using inventory;
- how to refund a payment;
- and how to split sales, pay for individual products, and merge sales together.
Go through the Tebi App Settings
Many cafes like to set their sales mode to counter sales, this is most applicable when customers order from you and pay directly. When the sale is completed, the next sale will automatically open.
If you are serving multiple customers at the same time, you can select service sales as your sales mode.
Go through the rest of the Settings to make sure the Tebi App is set up the way you want. This also includes printing settings for receipts and prep stations.
Add users to the Tebi App
Give your team access to the Tebi App and assign a role to control what each user can access. View the variety of permissions granted to the various roles here. You can add new users through the Back Office or the Tebi App.
Payment methods
- If most of your payments are done by card, you can set this as your preferred payment method in Quick Pay. With this, you do not have to select the payment method after every sale, allowing you to take payments even faster. Flexibility has been built in to select a different payment method if needed.
- In case the normal payment flow doesn’t work, or a customer has forgotten their wallet, you can enable QR payments as a back-up.
- If your terminal is broken and you’re waiting to receive a new one, use QR payments or accept payments through Tap to Pay on iPhone.
- Enable cash as a payment method. Tebi allows you to follow cash movement and keep count of cash and tips.
- Create customer accounts for regular customers or business partners, making it quick and easy to add them to sales, and allowing them to pay afterwards through invoicing.
Terminal display
You can enable tipping in the Tebi Back Office under Terminals. You can select up to four tipping options in percentage or amount.
You can also personalize the customer-facing display on the terminal to showcase your brand and blocking access to Tebi and other apps when a device is within reach of a customer.
Discover other features
- Floor plan: set up a floor plan if you work with seating, so you can assign sales to a table.
- Reservations: manage your reservations with Tebi. This system also allows for bookings for workshops or special events.
Tebi administration
Find out more about how to access your financial data, look into your payouts, and generate reports: see Tebi administration.
Troubleshooting and support
Congratulations, you’re all set up. If you’re facing any issues along the way, take a look at our troubleshooting articles or contact support@tebi.com.