Using a printed prep station
Using printed prep tickets
Start by connecting the printer to the internet and select the printer job that needs to be assigned to that printer:
- In the Tebi App on your tablet, go to Settings, then Printing
- Go to the Printer selection and Scroll down to view all the printer jobs
- Click on the printer job (e.g. Prep station: [name] to select the printer that you would like to use for that prep station
- When selected, click on the settings wheel to set the number of receipts, margin and the font size
- Find out more about the printing filters in the section below
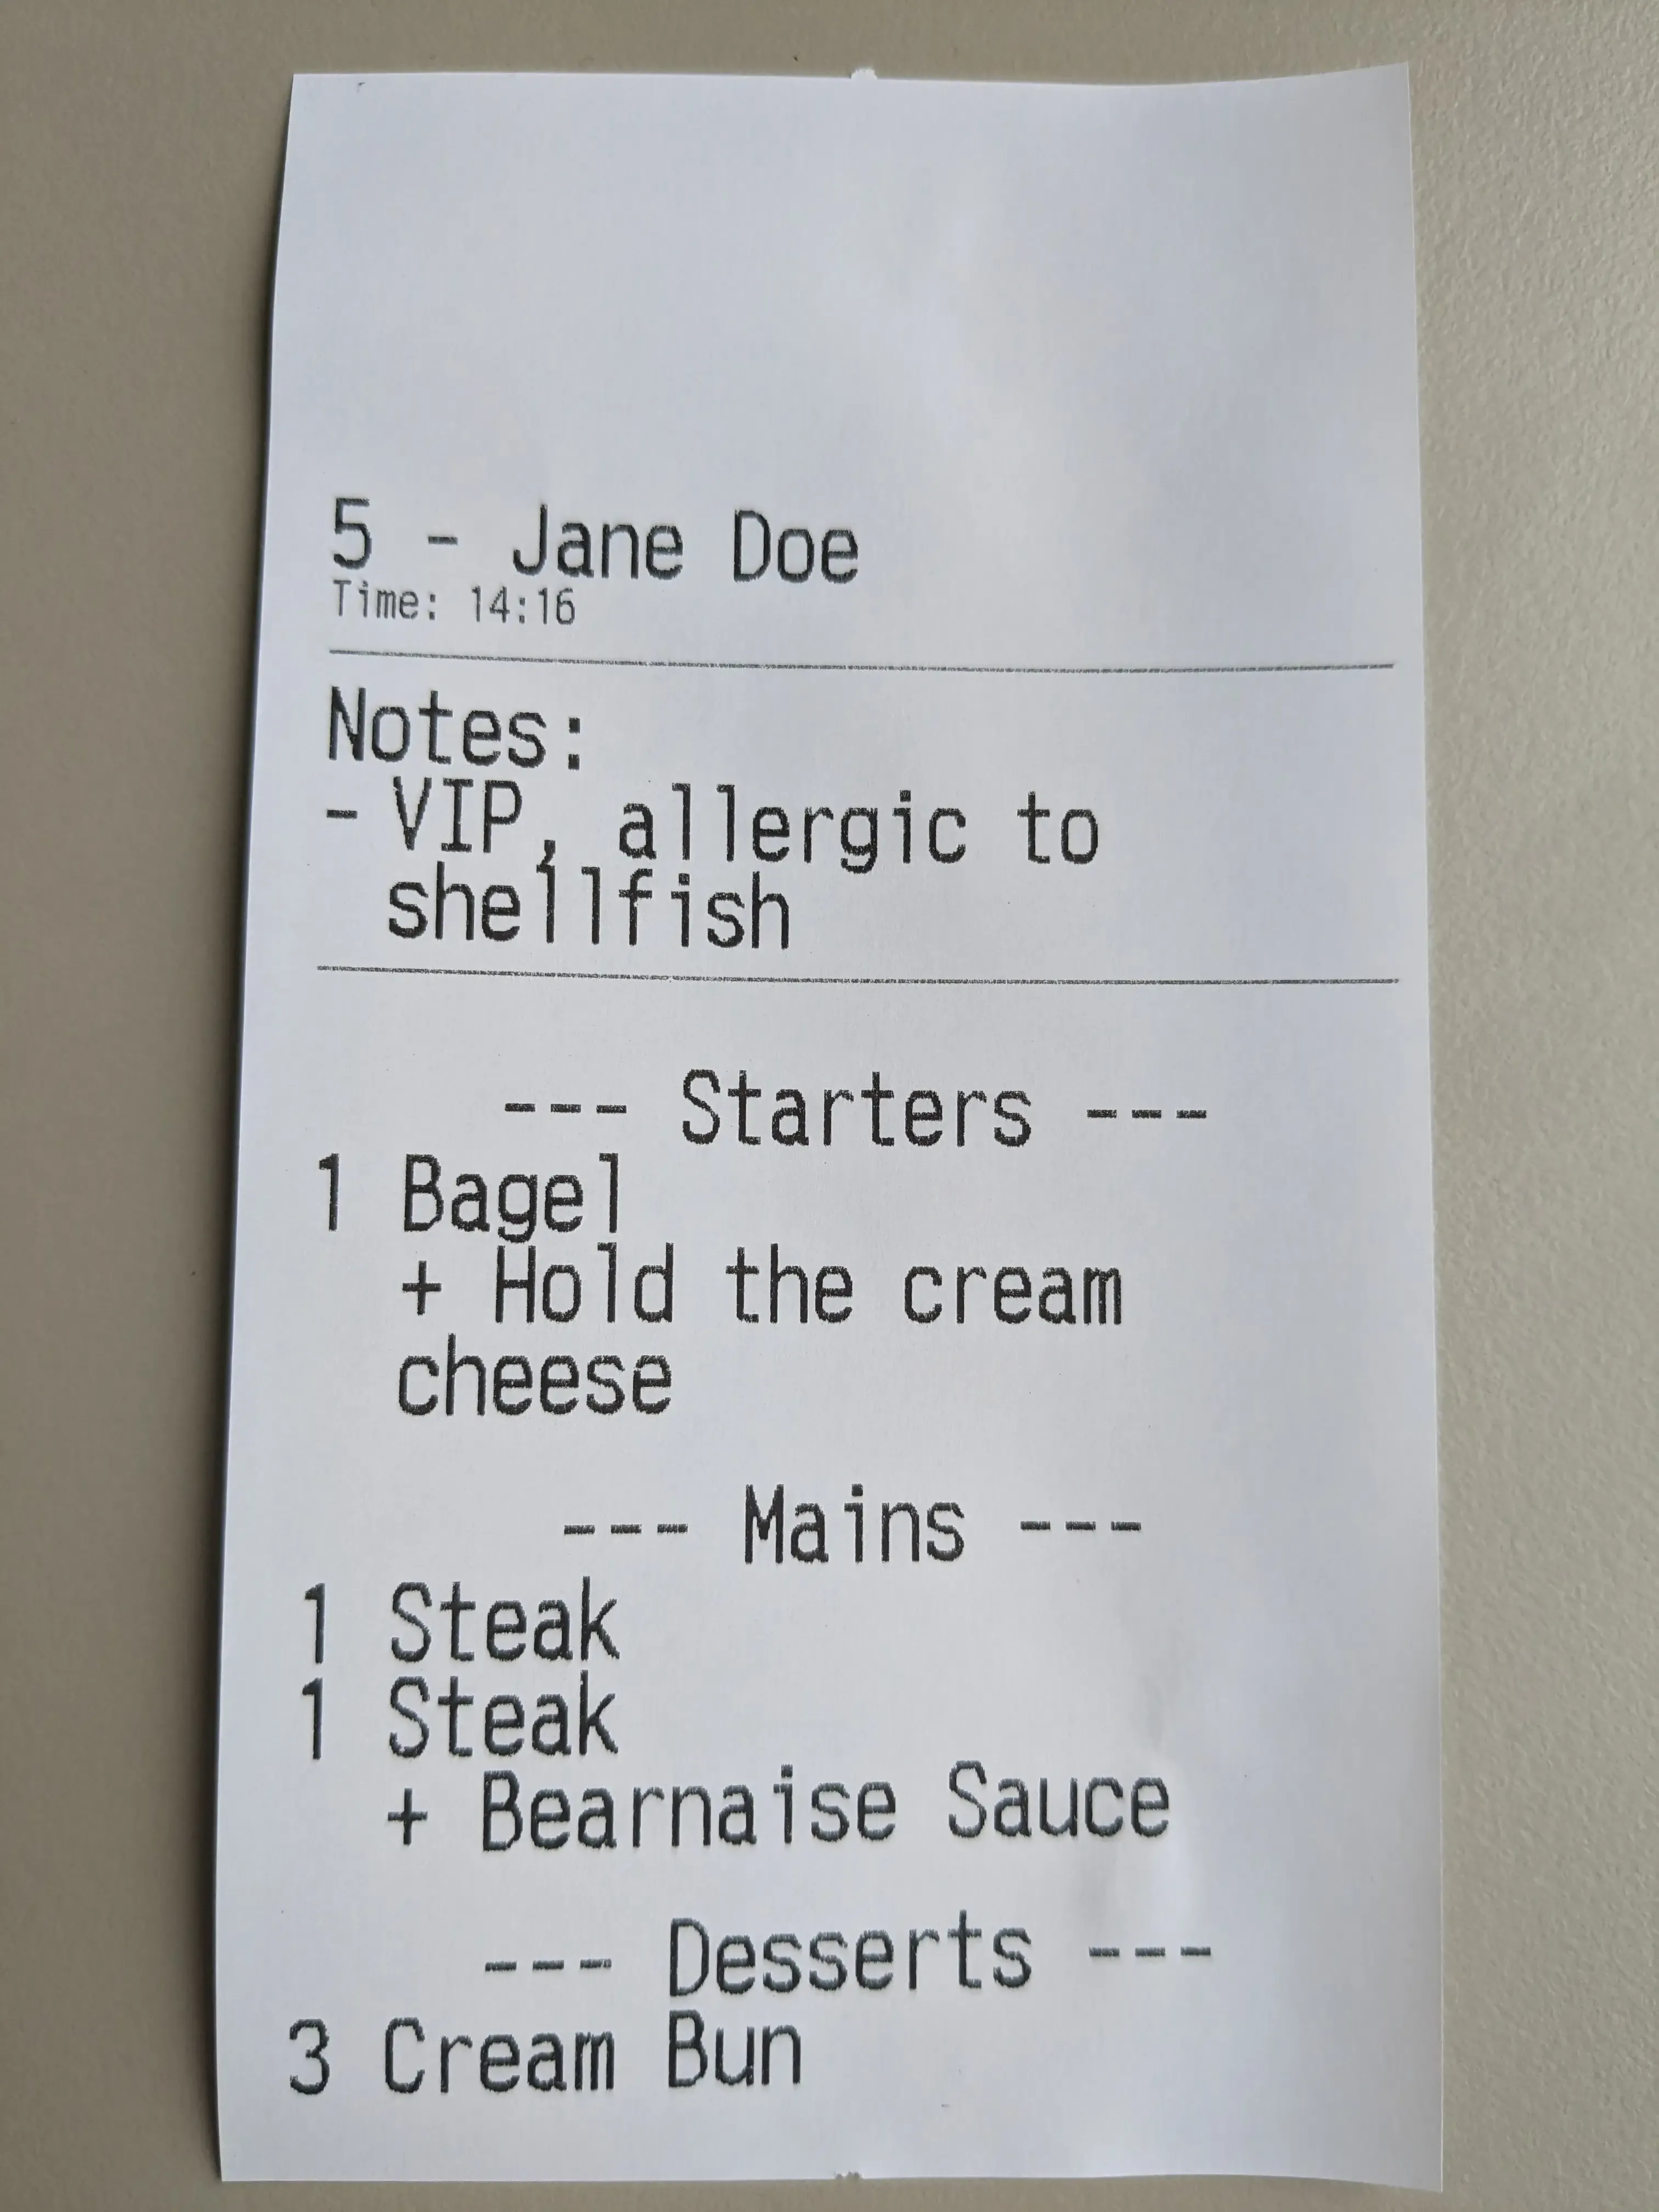
Prep tickets will automatically print whenever products which are assigned to the Prep Station are submitted in a Sale. Tickets will also print when products are added, removed or edited in a Sale and when customer and sale details change. See the example below.
Printing filters
How to use
Use the prep station print filters to determine whether to print a prep ticket for an area or a set of products, for example:
1. Filters allow you to create an complete overview prep ticket and prep tickets for other stations. For example, get an overview ticket at the pass with all products and show a selection of products at the cold kitchen station (e.g. salads and sandwiches).
2. Prep station A should know about the prep items for Prep station B. For example: hot station needs to know what the cold station will work on, but cold does not.
3. Print at the physically closest printer to a table or area. For example: a venue with the same products available at multiple bars spread across a large area.
How to set up
- Go to Printer Selection and scroll down to Printer Jobs to select the Prep station job
- When selected, click on the settings wheel
- Click Table and area filter and select:
- Off - to print prep order tickets from all tables.
- Include - to only print prep order tickets for the selected tables or areas
- Exclude - to print all prep order tickets for all tables, except for the selected tables or areas
- Product filter
- Off - to print all products on a prep order ticket
- Include - to only print prep order products that match the selected products or tags
- Exclude - to print all products, except for the selected products or tags
- Choose to print table change tickets
- Choose to print sale note change tickets
- Choose to print course firing tickets
Communicate with the Kitchen
Notes allow front-of-house staff to add multiple notes to a Sale to communicate important information like customer preference to the kitchen (e.g. allergies or dietary requirements). They can:
- Choose whether notes go to the kitchen
- Mark notes as important (highlighted in red at the prep station)
This approach improves communication and order precision during service.
Product sort order
This reflects in what order the products will be visible on the prep tickets. In the app go to Settings > Prep stations and under product sort order are 2 options.
- As ordered: Products will stay in the same order and the order has been put in
- A -> Z: The product order will be changed to show alphabetically
Sale notes
- Open a Sale
- Open the Sale menu by tapping Untitled or the Sale/Customer name
- Tap Add a note
- Type the note and tap the tick to complete
- Tap the exclamation mark ! to make it an important note
- Tap the Chef’s hat to include the note in prep tickets
Product notes
- Tap a product(s) in sale details
- Open the edit menu by tapping the pencil
- Tap Add a note
- Type the note and tap the tick to complete
- Tap the exclamation mark ! to make it an important note
- Tap the Chef’s hat to include the note in prep tickets
Move products to other courses
You can move products to other courses in a Sale, for example if a customer wants a starter as a main. To do this:
- Add the product to a Sale in the Sales screen in the Tebi App
- Tap the product name in the sale after it has been added to the Sale
- Tap the Pen icon
- If the quantity of the selected product is more than one, use the bumper to select the amount of products you want to move
- In the Course section, select the course you want the product to move to
- Tap Done
Printing errors
The Tebi App will communicate to you when a printing error has occurred, with extra information about the cause of a prep ticket printing failure. For example: the printer has run out of paper or is switched off. How this works:
- On the device on which the order was placed, a red printer icon appears in the bottom-left notifying that there is a printing error. Clicking this icon will show the error and allow you to ignore it, or go to the prep station and see which tickets failed to print.
- In the prep station, each ticket now displays whether it was successfully printed or not. This is visible on any device.
- There is a printer button on the prep station ticket. Clicking this will allow the ticket to be reprinted after the printing error has been solved.
- Alternatively, at the top-right of the prep station there is a button to retry _all_ failed tickets.
- If a device that controls a prep station printer is offline, when it comes back online it will ask if you want to reprint or skip any missed prep tickets.