Setting up Tap to Pay on iPhone
If you’d like to use the option to accept payments through Tap to Pay on iPhone, please follow the following steps:
- You need to have accepted the Tebi Terms of Service and use Tebi Payments for this feature to work.
- Activate a lockscreen on your iPhone, otherwise Tap to Pay will not work on your device.
- On an iPhone X or newer, go to the App Store and download and install the Tebi app.
- Open the App, log in to your ledger, and go to Settings.
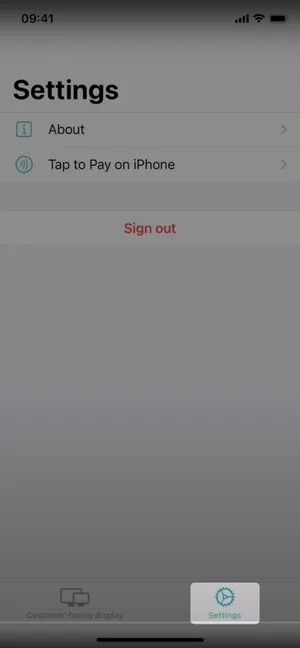
- Click on Tap to Pay on iPhone.
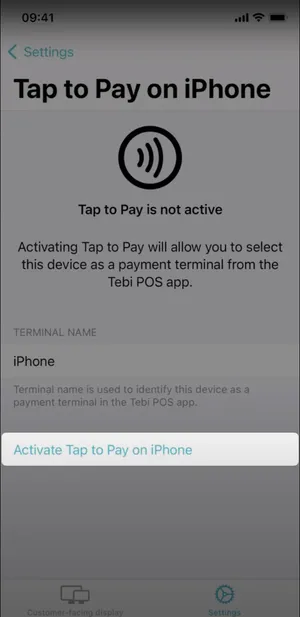
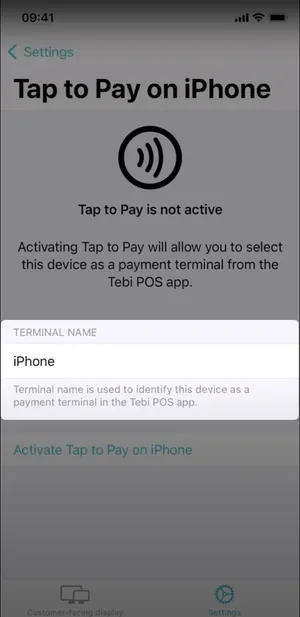
- Set the Terminal name. Terminal name is used to identify this device as a payment terminal in the Tebi POS app.
- Click Activate Tap to Pay on iPhone. If you’re not logged in as a Manager or higher you will be prompted to get manager approval.

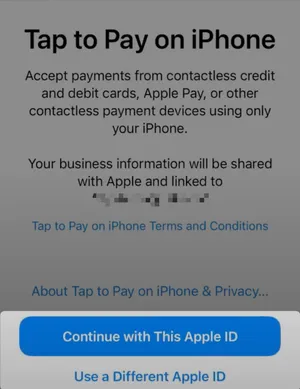
- Select the Apple ID that needs to be associated with the ledger. Make sure the initial Apple ID used belongs to the owner of the organzation. This can not be changed at a later stage. If the device on which Tap to Pay is installed does not belong to the owner, use the option “Use a different Apple ID”.
- Once Tap to Pay has been activated, Go to Sales > Pay > Card > Terminal and select the device name.
- You can now accept payments on your iPhone.
Each iPhone Tap to Pay payment has a surcharge of €0.06.
Having issues?
Here are a few steps you can follow to resolve this issue:
Check if the Tebi app is up to date: Make sure you have the latest version of the Tebi app installed on your phone.
Check settings: Open the Tebi app, log in to your ledger, and go to Settings > Tap to Pay > Verify that the Tap to Pay feature is configured correctly. Make sure the terminal name is set correctly and that the feature is activated.
Quick Pay settings correctly: You can check this on the device you want to use for Tap to Pay: in the Tebi App go to > Settings > Preferences > Payment > Quick Pay > Payment Terminals > Select the correct terminal (your phone).
Apple ID: Check that the correct Apple ID is linked to the ledger. This should be the Apple ID of the organization’s owner.
Security settings: Make sure you have enabled a lock screen on your iPhone, as Tap to Pay will not work otherwise.
Network connection: Ensure your iPhone has a stable internet connection.
If these steps do not resolve the issue, reach out to support@tebi.com.
We recommend you set up Guided Access on your iPhone to prevent customers from accessing any other apps on your device.