Adding product modifiers or notes to Tebi
What are modifier groups?
The modifier groups consist of two groups: note and product modifiers.
Product modifiers
These modifiers are the add-ons or customizations that your customers can choose for a product. Perhaps it’s extra bacon on a burger or oat milk in a cappuccino. A product modifier can cost extra or it can be free. It can be optional or mandatory. You can even apply multiple modifiers to one product.
Note modifiers
Note modifiers are a form of internal communication that can be used for multiple indications, such as allergies and dietary requirements or the preparation of a steak. A note is always free of charge. It can be optional or mandatory.
Where to find modifier groups
In the Tebi Back Office
Go to the Back Office > Products > Modifier Groups. In the top right corner you find Add Note Modifier to assign notes to products and Add Product Modifier to assign modifiers to products.

How to add modifier groups
Note: Only Manager & Owners users can add and edit products and modifiers. If you’re unable to add products or modifiers, check your role.
In the Tebi Back Office
Adding a note modifier
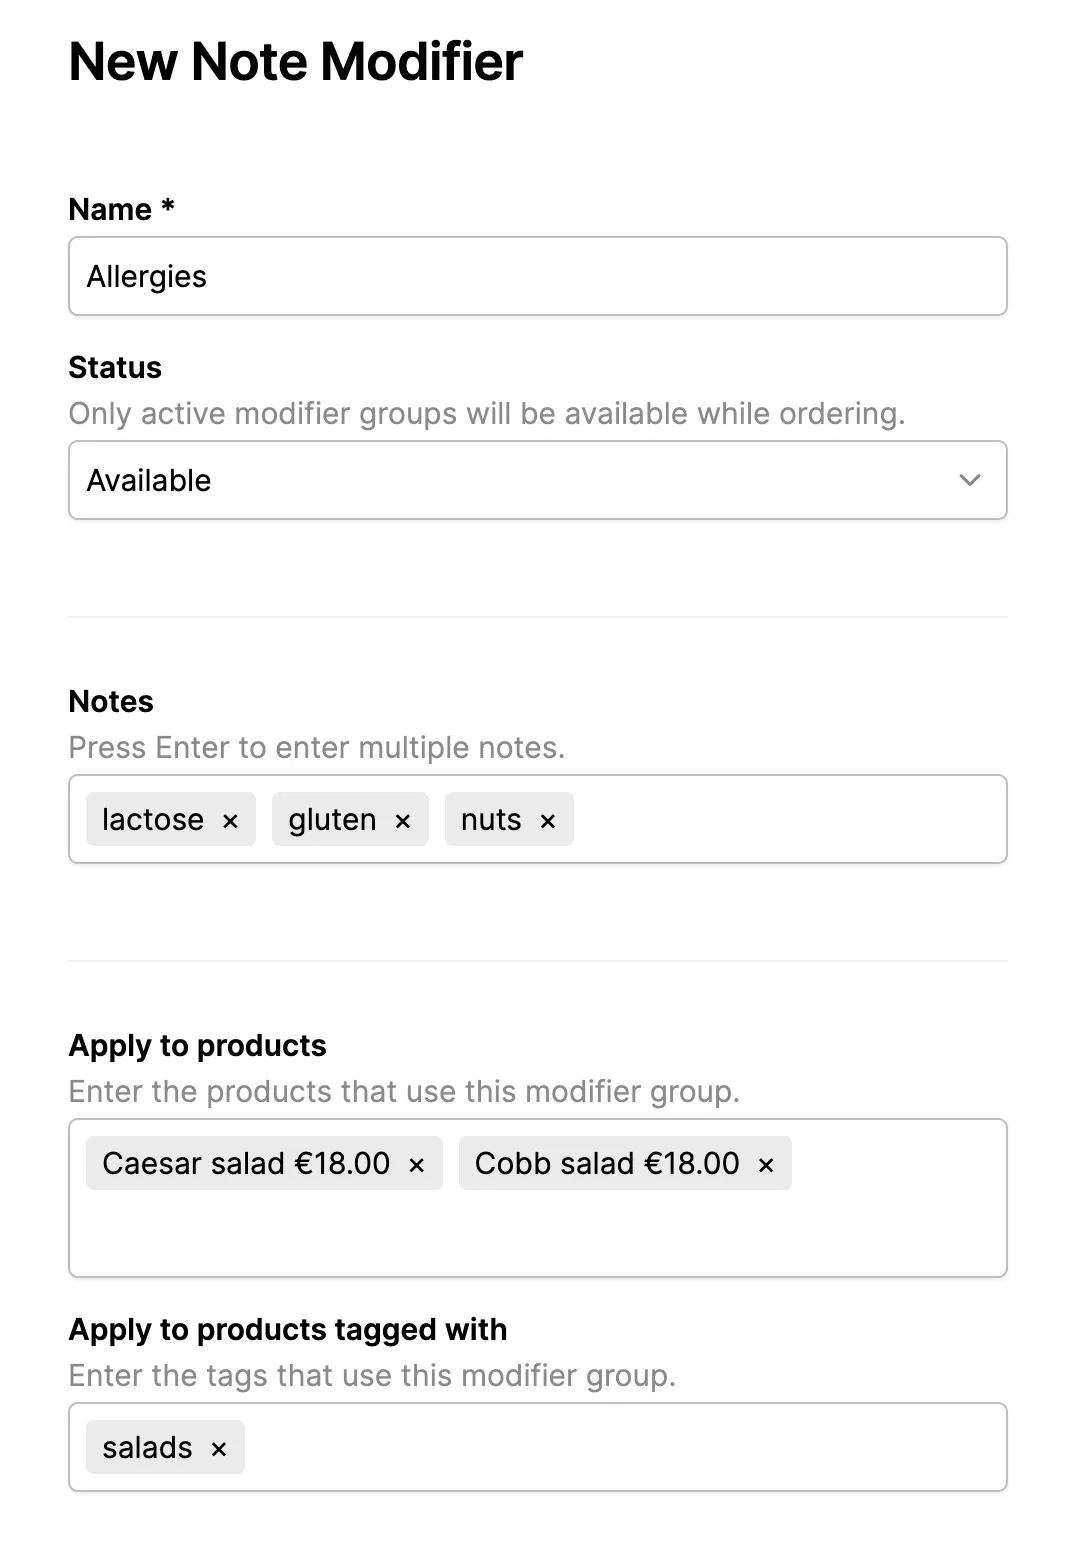
For example, adding allergy options to the products ‘Caesar salad’ and ‘Cobb salad’ as notes: lactose, gluten, nuts.
Go to Products > Modifier Groups. Click on Add Note Modifier and fill in the information asked:
- Name*: Give the new note modifier a name (e.g. ‘Allergies’)
- Status: Select status ‘available’ if you want the product to be available for sale. Products with the status ‘archived’ or ‘not available’ will not be available for sale.
- Notes: Add notes that can be selected (e.g., lactose, gluten, nuts)
- Apply to products: Assign products you want the notes to apply to, for example, ‘Caesar salad’ and ‘Cobb salad’.
- Apply to products tagged with: Assign tags you want the notes to apply to, for example, ‘Salads’.
- Note: you will not be able to see which notes have been applied to product/tags in the Product List. But you can see these in the Modifier Groups.
- Show modifier pop-up: Select one of the following options:
- Edit a product in a sale to select modifiers from this group.
This option does not appear automatically when a product is selected on the Sale Screen. To add the notes, click on the product and select the Edit ✎ button to add it. - Always show pop-up and require modifier selection.
- Always show pop-up but modifier selection is not required.
- Edit a product in a sale to select modifiers from this group.
- Select preferences for the note modifier.
- Turn on the toggle Allow multiple selections to pick several options
- Turn on the toggle Select first option by default to automatically pick the first option to speed up order entry
- Turn on the toggle Allow adding the same modifier multiple times to add how many glassed you would like to add to a bottle of wine. You can increase the quantity once the product with the modifier has been added to the Sale.
- Enter the Max options that can be selected. This is only applied to QR ordering.
- Click Save to add the note modifier.
Adding a product modifier
Using the example of adding various milk options to the products ‘Cappuccino’ and ‘Latte’ as modifiers: whole milk, oat milk, and soy milk. First, add each milk type as a product:
-
In the Tebi Back Office* > go to Products > Product List
*If preferred, you can also add the modifier products in the Tebi App.
-
Turn on the ‘Modifier only’ switch. If you also want to sell the modifier as a separate product, leave the ‘Modifier only’ switch turned off.
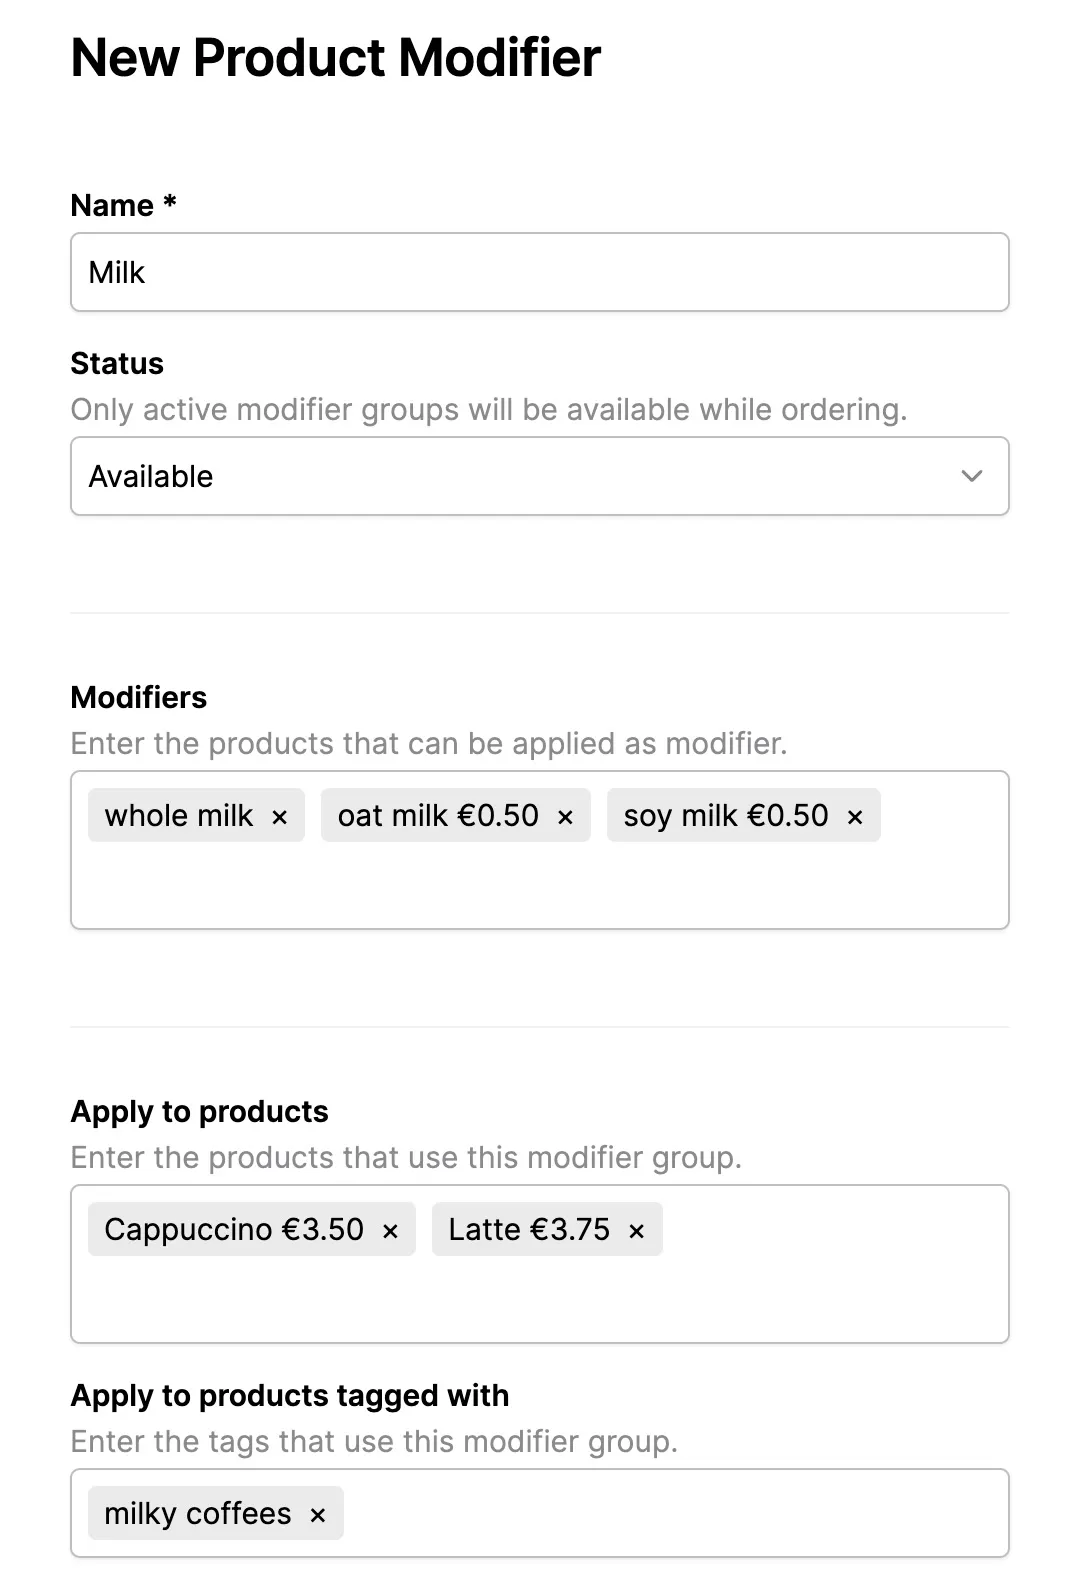
Go to Products > Modifier Groups. Click on Add Product Modifier and fill in the information asked:
- Name*: Give the new product modifier a name (e.g. ‘Milk’)
- Status: Select status ‘available’ if you want the product to be available for sale. Products with the status ‘archived’ or ‘not available’ will not be available for sale.
- Modifiers: search and add the products (e.g. whole milk, oat milk, soy milk) you just created in the Product List.
- Drag and drop products in this Modifier field.
- The products will appear in the same order in QR ordering and in modifier groups in the App.
- Apply to products: Assign products you want the notes to apply to, for example, ‘Cappuccino’ and ‘Latte’.
- Apply to products tagged with: Assign tags you want the notes to apply to, for example, ‘Milky coffees’.
- Note: you will not be able to see which modifiers have been applied to product/tags in the Product List. But you can see these in the Modifier Groups.
- Show modifier pop-up: Select one of the following options:
- Edit a product in a sale to select modifiers from this group.
This option does not appear automatically when a product is selected on the Sale Screen. To add the modifiers, click on the product and select the Edit ✎ button to add it. - Always show pop-up and require modifier selection.
- Always show pop-up but modifier selection is not required.
- Edit a product in a sale to select modifiers from this group.
- Select preferences for the product modifier.
- Turn on the toggle Allow multiple selections to pick several options
- Turn on the toggle Select first option by default to automatically pick the first option to speed up order entry
- Turn on the toggle Allow adding the same modifier multiple times to add ketchup twice or two shots of espresso. You can increase the quantity once the product with the modifier has been added to the Sale.
- Enter the Max options that can be selected. This is only applied to QR ordering.
- Click Save to add the product modifier.
Once the Modifier Groups have been added, they will be visible in the Tebi App > Products. Go to an existing product or create a new one > go to the section Modifier Groups to select one of the Modifier Groups.
With your modifier groups added, it’s time to design your Floor Plan.