Adding and setting up your Floor Plan
If you work with seating, we recommended you add a Floor Plan. With a Floor Plan you can assign sales to a table and see them on the Floor Plan where you place them.
Log into the Tebi Back Office and go to Settings > Floor Plan.
Floor plan options
There are two floor plan options with Tebi: Lite and Advanced.
The Lite floor plan does not require tables to be created and allows sales to be placed without tables. It is often used when a simple geographic placement of sales is all that is required.
The Advanced floor plan is Tebi’s default floor plan. It is highly recommended when using reservations or providing table service. Advanced maps sales directly to tables, stores any sales without tables in the Direct sales menu in the bottom bar and when you drag a second sale to a table it will stay on the table rather than merging.
Designing your floor plan
You also have several options when designing your floor plan: a still image with tables already drawn on it or a customizable floor plan where you can draw tables as you go.
Still image option
- Upload a floor plan image by clicking Customize at the top right corner and upload your image. Turn the Draw tables toggle off and save.
- From the toolbar, add your tables, areas and table groups accordingly, see below for a longer description on how this works.
- Click Preview to see what your floor plan will look like on the Tebi App.
Customizable option
- Click Customize at the top right corner, either upload an (fun) image or choose a background color for your floor plan set-up.
- Turn the Draw tables toggle on and save
- Start by adding your first table, giving it any background, border and text color you prefer. While selecting the first table, and clicking Add table under the Toolbar, another table will be created in the same color scheme.
- Now continue to fill up your business with tables, areas and table groups.
- Click Preview to see what your floor plan will look like on the Tebi App.
Add and edit tables
- Click Add table.
- Configure settings like Table name, Background color, and Group size(for reservations).
- These settings will be remembered next time you create a table.
- Table number will automatically increase. For example, if you add a table 101, then the next one you add will be 102.
- Edit tables by selecting them on the floor or from the Tables list.
- Edit and select multiple tables by holding shift and clicking on multiple tables or hold shift and drag your mouse to select.
Note:
- Sales with a table will conform to the table as drawn in the Floor Plan and will display more or less information (like name and sales notes) on the Sale card depending on how much space is available
- We recommend you make your tables big enough to accommodate for amount due and guest name info
Add areas
- Adding areas affects reservations and view ports in the Floor plan on the Tebi App
- Click Add area
- Adjust the size to cover whichever tables are within the area
Add table groups
- Table groups are used for combining tables for larger groups in reservations
- Click Add table group and expand the box to cover the tables that can be brought together
- Add a capacity Modifier in cases where you lose or gain seats when tables are grouped together
Floor Plan settings
There are Floor plan preferences you can enable or disable, such as displaying the amount due, allowing sales outside of tables, showing reservations on tables and highlighting sales.
- In the Tebi App, go to Settings > Preferences
- Scroll down to the section Floor plan
- Show sale notes will use the content from a sale note as the title for a Floor Plan card
- When Allow invoices outside tables switch is turned on, a sale must be added to a table when it is created and moved on the Floor Plan. Otherwise sales can be created anywhere in the Floor Plan.
- Show reservations on tables will display information about upcoming reservations on the Table Grid
- (Advanced floor plan only) When Always open the table menu is enabled the table menu will open when tapped in the floor plan, allowing you to create a second sale at the table quickly
- (Advanced floor plan only) Immediately create sales on open tables does not open the table menu and will create a new sale straight away. Can only be enabled when Always open the table menu is ** ** also enabled.
- Lock floor plan orientation allows the floor plan to be viewed in portrait mode. Useful when using the floor plan on terminals or mobile devices.
- Turn on the setting Highlight sales to display that sales have not been opened in a while. This is visible in the Table grid and on the Floor plan.
- Callout until: Sales will be outlined in blue until the first order is submitted on the sale. This can be used to see when guests have just arrived.
- Minutes until warning: ** ** Sales will be outlined in yellow (warning) based on the times you set.
- Minutes until urgent: Sales will be outlined in red (critical) based on the times you set.
- Finishing when: Sales will be outlined in purple when the reservation time is up or when the receipt is printed for the guest to review.
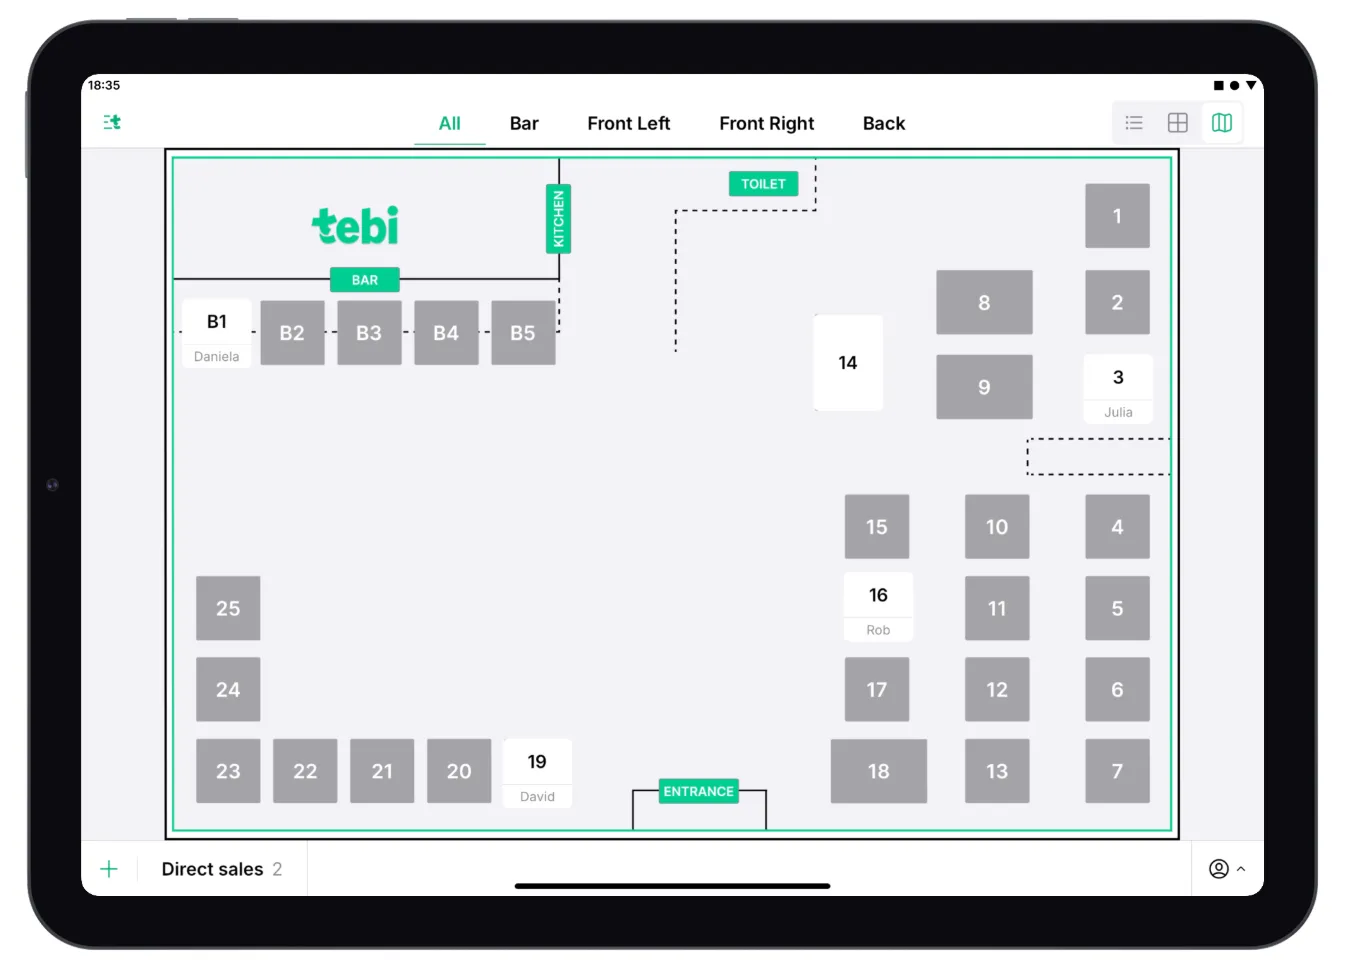
Using the Floor Plan
- Sales without tables are created in the Sales list and clicking the green + icon
- Sales with a table will conform to the table as drawn in the Floor Plan and will display more or less information (like amount due and sales notes) on the Sale card depending on how much space is available. We recommend you make your tables big enough to accommodate for amount due and guest name info.
- Multiple Sales can easily be stacked on the same table.
- Drag a Sale to a table to stack it
- Tap a table with multiple sales to open the stack and select the relevant sale
- To merge Sales:
- click on the Sale > click on the three dots
- Select Merge sale
- A second option is by dragging the table to the right destination and confirming. To use this feature, make sure it’s turned on Settings > Preference > scroll down to FLOOR PLAN and turn on the toggle for “Allow drag-and-drop sale merging”.
- On the bottom right of the screen you can select what the Sale cards show:
- Sales amounts;
- Sales name (customer name or sale reference); or
- Upcoming reservations, sale amounts or sale name.
- Tip for larger venues:
- Use the All area to get an overview of how busy it is or how much capacity is left
- Use the specified (smaller) areas to work operationally in the area