Add your first product in the Tebi Back Office
Add products to the app via:
- the Tebi App
- the Tebi Back Office, as explained below
Note: Only Manager & Owners users can add and edit products. If you’re unable to add Products, check your role.
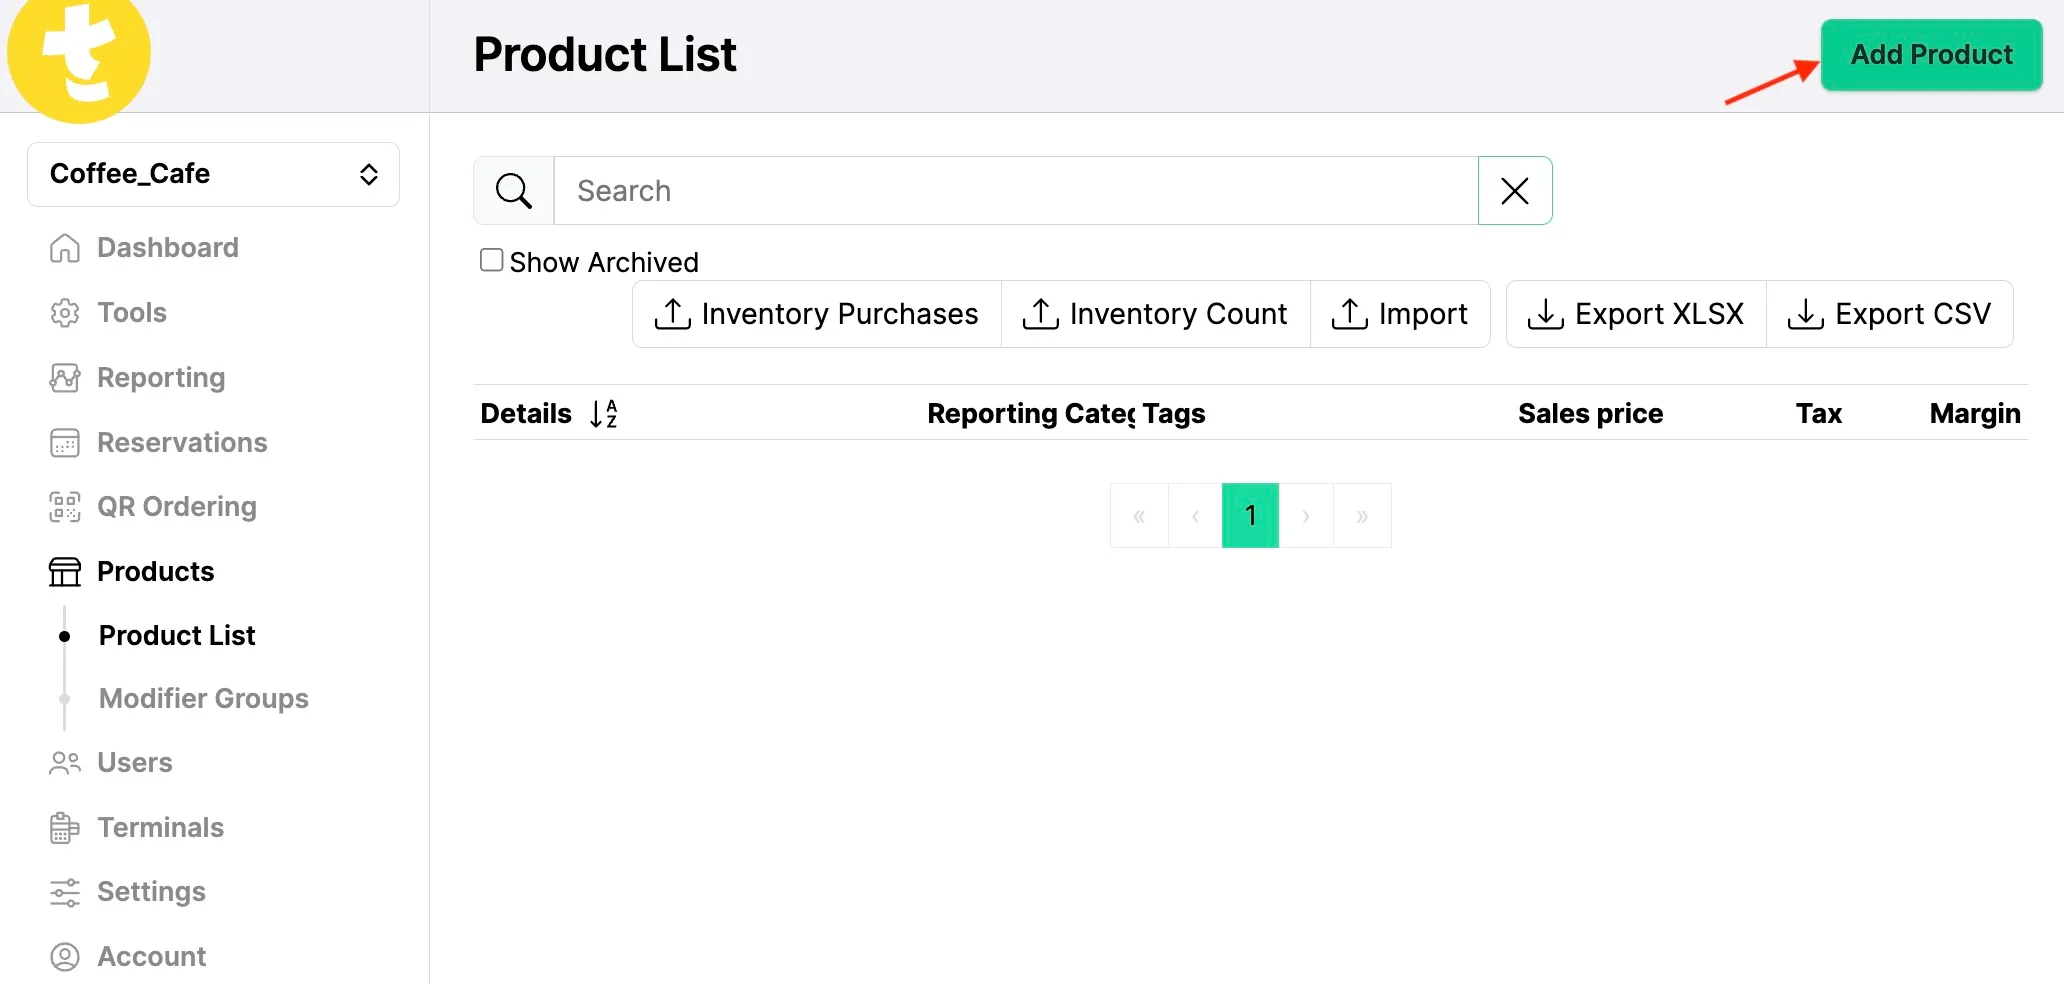
Creating products in the Tebi Back Office
- In the Tebi Back Office, go to Products.
- In Product List, click the green Add Product button to add a new product.
- Products can be configured with additional languages. Add languages in the Settings > Languages.
Required fields
- Name: Type the full name of the product. This will be used in reports and searches.
- Sales price: Add the amount you will charge customers for the product, including or excluding tax depending on the tax type you select below.
- Prompt price while ordering: If the ‘prompt price’ switch is turned on, the pricing field will be prompted in the Sale Screen. Manually add the price each time you select the product. If the ‘prompt price’ is turned off, the sales price will be shown.
- Tax type: Select the tax rate for this product. This is the type of tax payable over your product or service. It can be VAT or sales tax, depending on your region.
- Status: Select status ‘available’ if you want the product to be available for sale. Products with the status ‘draft’ or ‘not available’ will not be available for sale.
- Purchase price (excl. tax): Add the amount it costs to buy and/or make the product, excluding tax. Tebi uses this to calculate the margin on a product. If you do not wish to fill this in, leave it €0.
- Modifier only: When ‘modifier only’ is switched on, this product is only available as a modifier on another product. If the switch is turned off the product will also be available as a stand-alone product. Find out how to add product modifiers.
Modifier groups
Group modifiers, sides and extras that customers can add to this product. For example: sauce choices, cooking preferences or toppings.
- Manage modifier groups: Select an existing modifier group, edit a modifier group or add a new one
- To add a new one, click Add modifier group and add the following:
- Name
- Status
- Select the type of modifier:
- Notes: Gather information about the product, such as allergies or spiciness.
- For note modifiers, add the notes and click enter to add another one.
- Products: Set up the modifier as an additional product to charge money, track inventory and gain reporting insights. E.g additional toppings, plant-based milk types.
- For product modifiers, select an existing product or add a new one
- Notes: Gather information about the product, such as allergies or spiciness.
- Show modifier pop-up: As soon as you tap on a product, the modifier pop-up will have the selected behaviour:
- Edit a product in a sale to select modifiers from this group; or
- Always show popup and require modifier selection;
- Always show popup but modifier selection is not required.
- Select preferences for the product modifier.
- Turn on the toggle Allow multiple selections to pick several options
- Turn on the toggle Select first option by default to automatically pick the first option to speed up order entry
- Turn on the toggle Allow adding the same modifier multiple times to add ketchup twice or two shots of espresso. You can increase the quantity once the product with the modifier has been added to the Sale.
- Enter the Max options that can be selected. This is only applied to QR ordering.
- Click Save
Classification
- Category for reporting: Add categories to organize your products for reporting purposes in the Back Office.
- Products can be linked to only one category.
- E.g. gather all drinks with a VAT 21% under one category to gain insights on amounts sold.
- Tags: Add tags to organize your products into groups for display on the Sale Screen in the Tebi App.
- Products can be linked to multiple tags.
- E.g., gather all coffee products under various group tags by giving cappuccino, espresso and latte the tag ‘coffee’ and ‘hot drinks’.
- Tags are used for searching and discovering products.
- SKU: Fill in the stock keeping unit (SKU), a unique identifier for your product:
- SKUs are metadata and will not appear in the Tebi App.
- If you don’t use SKUs, leave this field blank.
Appearance
- Display name: A shorter name for the product in the App:
- This name will appear on the product button on the Sale Screen.
- If left blank, the name created at the top will appear by default.
- Description: Note down extra information about your product that you cannot add in other fields:
- E.g., add allergy details, ingredients of the dish, and so on.
- Note: Description information also shows on your QR menu.
- Whatever you enter here will become searchable from the Sale Screen, and visible in the product details in the Sale Screen when you long press a product.
- Color: Select a color for the:
- product tile in the Sale Screen;
- the digital Prep station (enable the toggle in the step below).
- Image: Upload an image. This will be visible in the Sale Screen, or when you long press on a product tile on the Grid.
Preparation
- Kitchen
- Prep station: Select the Prep Station where this product need to be produced. When the product is ordered, a ticket will be sent to that station. Find out how to add a Prep Station.
- Default course: Assign a product to a default course. Find out how to create Coursing.
- Preparation priority: Configure the order in which products will be shown in a prep ticket. Higher priority products will appear higher in the ticket.
- Use customization color in digital prep station: enable the toggle to highlight products and/or modifiers when they appear in the prep station with the chosen colour
Advanced
- Reduced tax part: For mixed-tax products, enter the amount of the sales price that should be charged at a reduced tax rate. E.g., a gin tonic costs €8, this consists of two products taxed separately: gin (€5, VAT 21%) and tonic water (€3, VAT 9%). Under ‘Reduced tax part’ you need to put ‘3’. The sales price stays €8.
- Tap Save and your product will be completed.
Other product details:
- GTIN: The Global Trade Item Number (GTIN) is a universal ID for your product. To maintain consistency of your products and reports it is vital that GTINs are unique numbers and are only used for a single product:
- GTIN is also known as EAN, UPC, ISBN and JAN.
- A GTIN will be automatically generated by Tebi when you create a product.
Add the product to the app
- Go to Sales in the app and enter the Sales Screen.
- Long press the View name tab to enter editing mode.
- Tap a tile with ⊕︀ and select Add a product, then select the product you want to add.
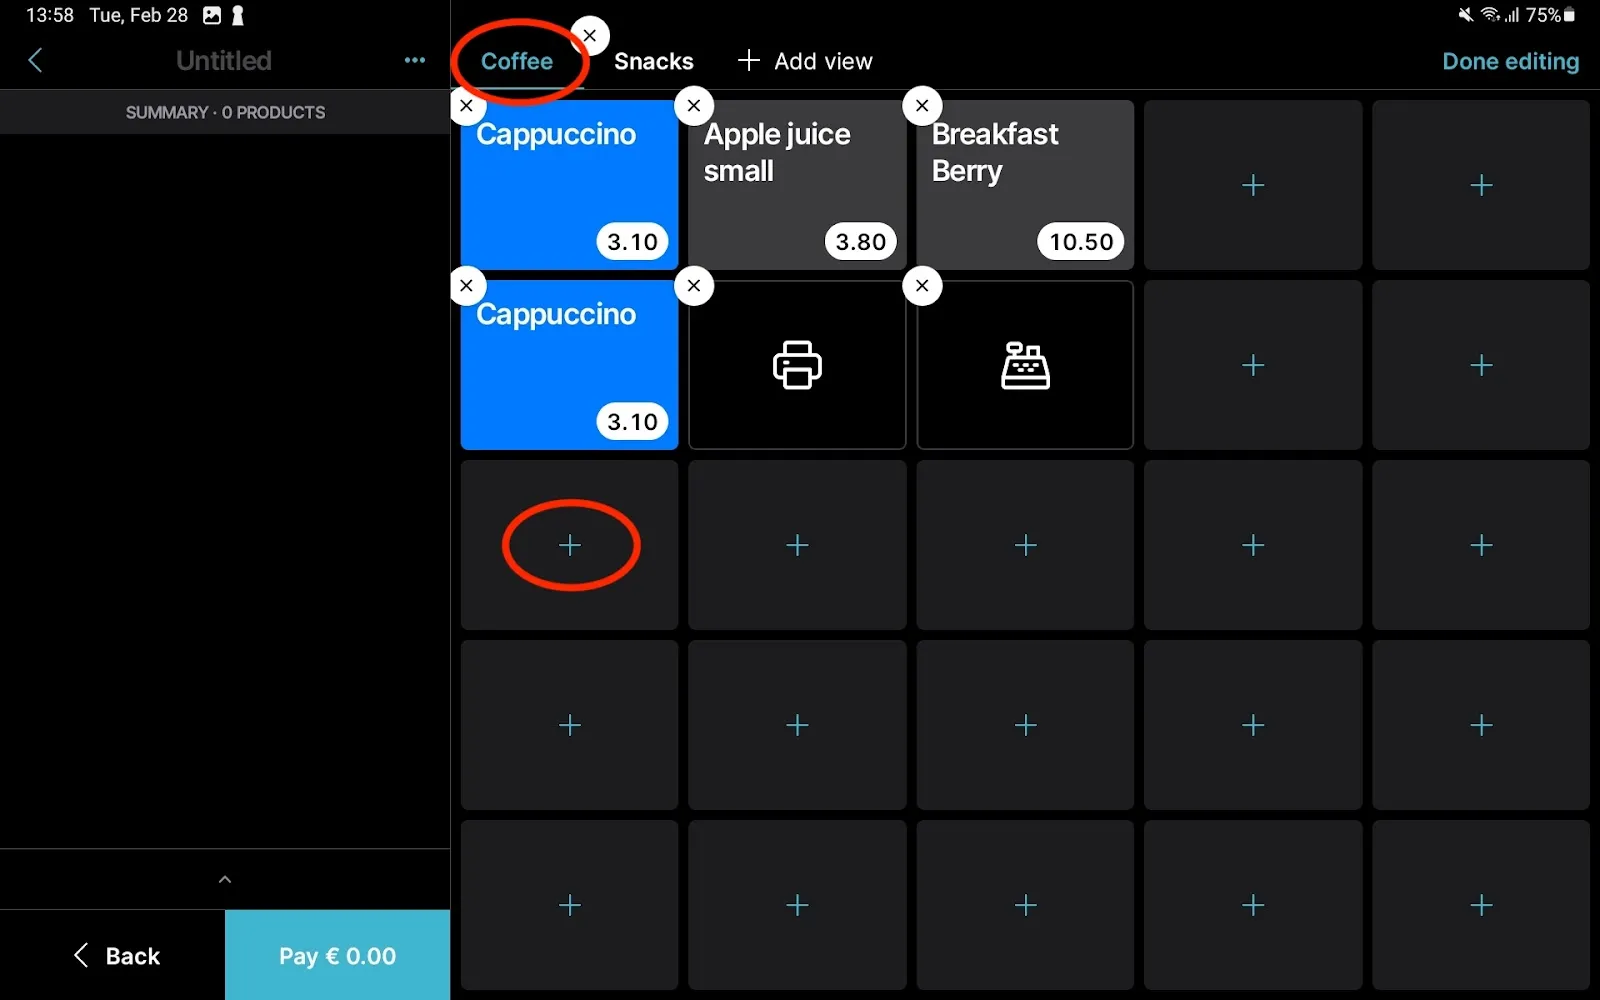
- Select a color and add a display name (if you haven’t already done so in the Tebi Back Office) for your product then press Done.
- To reposition, long press the tile and drag then drop the product to a new position.
- Tap ‘Done editing’ at the top right to finish adding products to the Sales Screen.
Read this article to learn more about how to set up the Sales Views.