Sales Training
This article will help you master the basics of managing sales, applying discounts, firing courses and issuing refunds in Tebi. Follow these steps to efficiently navigate the system and understand the logic and purpose behind each action you take.
Step 1: Get familiar with the Tebi Sales Views
In the Tebi App, there are three Sales Views: sales list, table grid, and floor plan. Take a moment to explore each area. The sales list lets you keep track of open and closed sales, the table grid shows the status and occupation of each table, and the floor plan organizes tables visually for easier management.
Step 2: Start a new sale
Click on a table in the sales grid to start an order. The selected table will appear at the top of the screen. This step is crucial because it associates each sale with a specific table, helping your team stay organized during busy shifts.
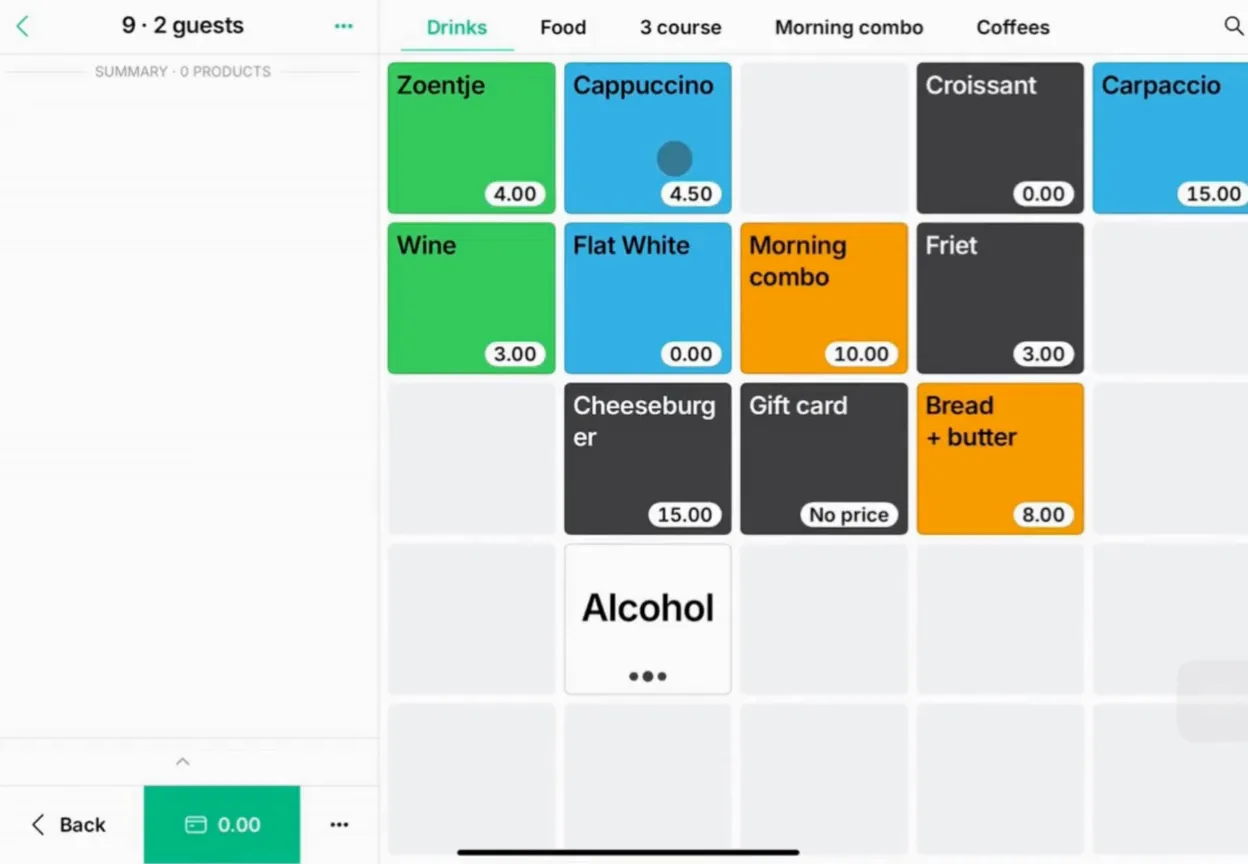
Step 3: Add products and apply modifiers
Choose products from the Sales Screen to add them to the sale. If a product has options (e.g., various sauce options or a different milk type), you’ll see prompts to select these modifiers.
Step 4: Review the receipt and customize sales
By tapping on the 3 dots at the top of the sale , you can: Apply discounts, Print/view digital receipt, View the history of the sale, Change the view between summary and order, and Remove all products. To apply discount to one product, select it, and click the discount icon in the shortcuts bar. To add notes for the kitchen (like special dietary needs), click the pencil icon. Notes help the kitchen prepare orders accurately.
There are also other shortcuts available: like changing courses, move products to other sales, paying for a selection of products, and more.
Tip: Only managers, team leads, or owners can apply discounts and remove products. Staff members will be prompted for approval.
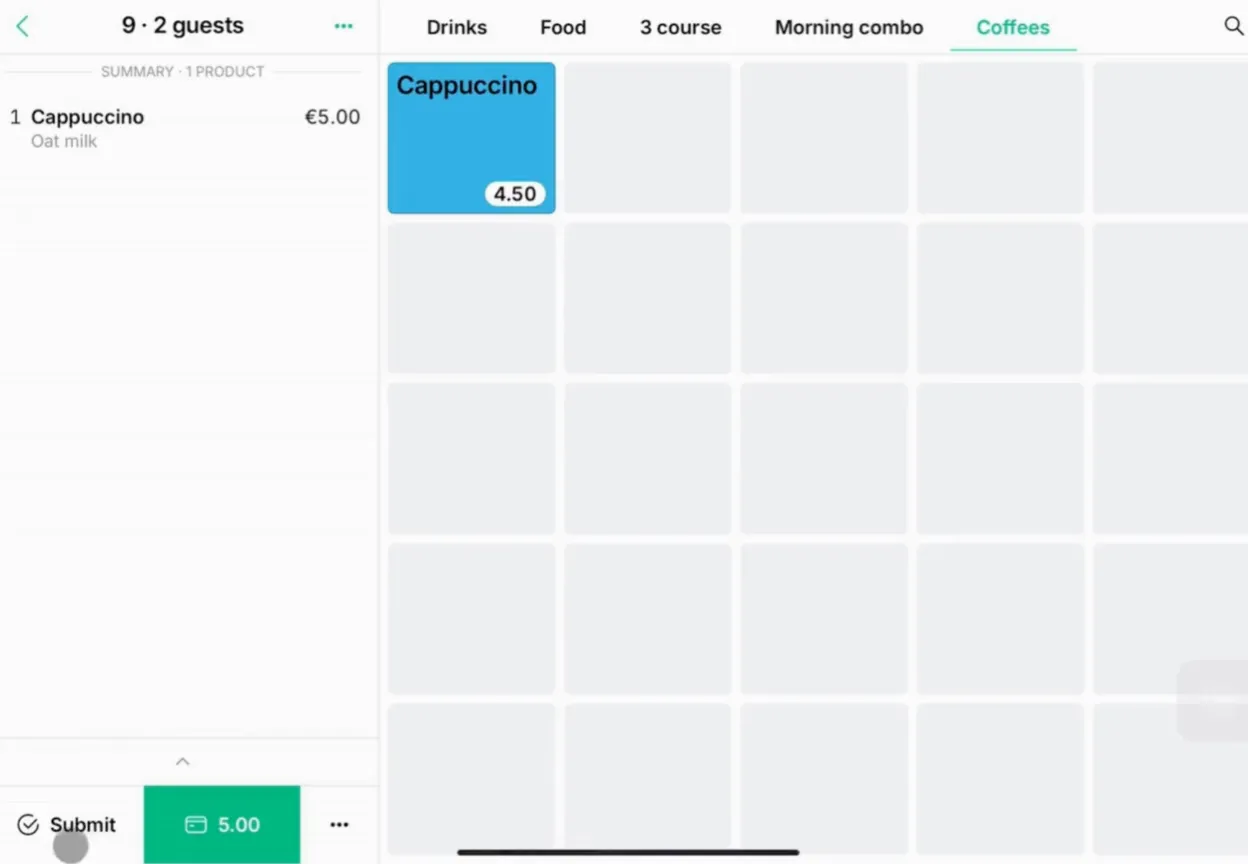
Step 5: Finalize & submit the order
Once you have verified the order details and applied necessary modifiers or notes, click Submit. This sends the order to the Prep Station (when applicable) and saves it in the system for payment processing later.
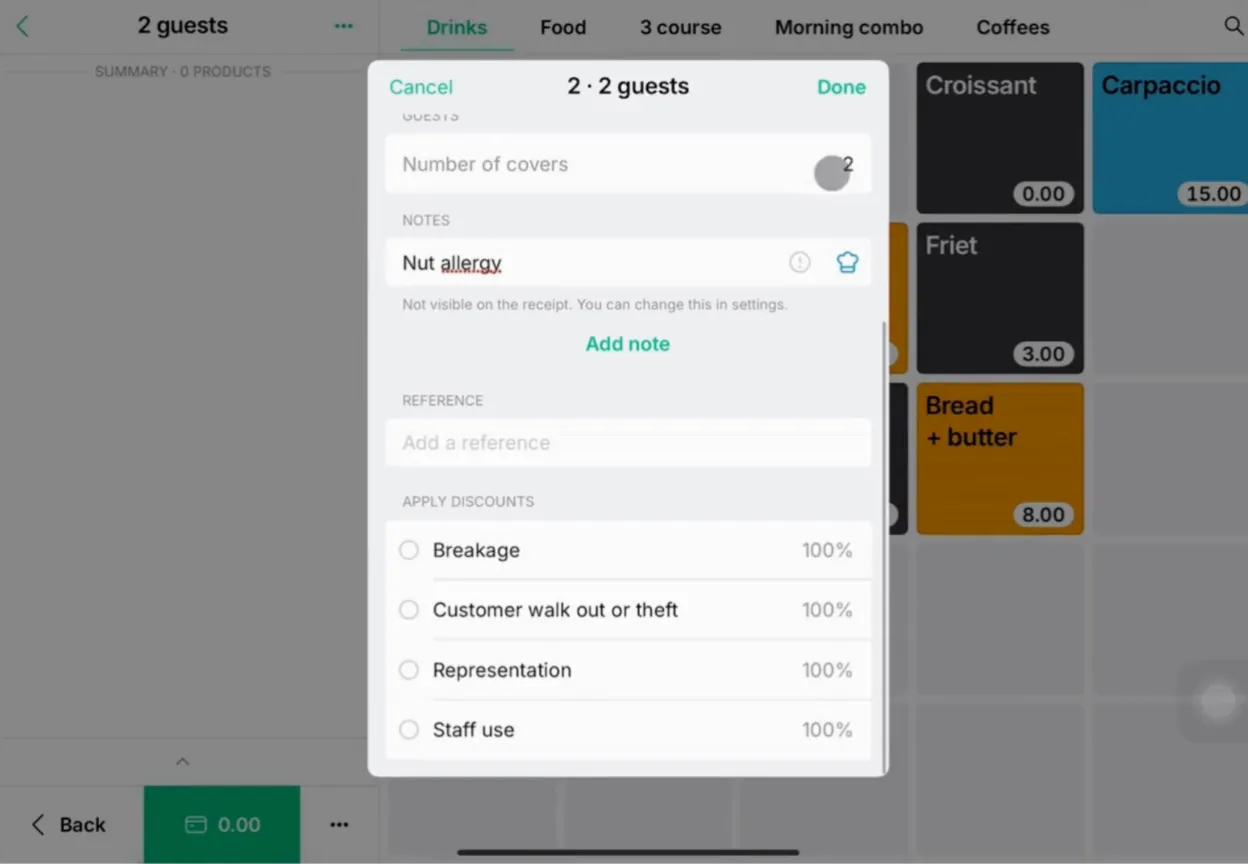
Step 6: Add notes to a table when needed
If you need to communicate a note that applies to the whole table (such as a birthday celebration or allergy warning), use the note feature visible at the top of the order summary. Make the note visible to the kitchen by selecting the chef’s hat icon—this ensures no important details are missed during food preparation.
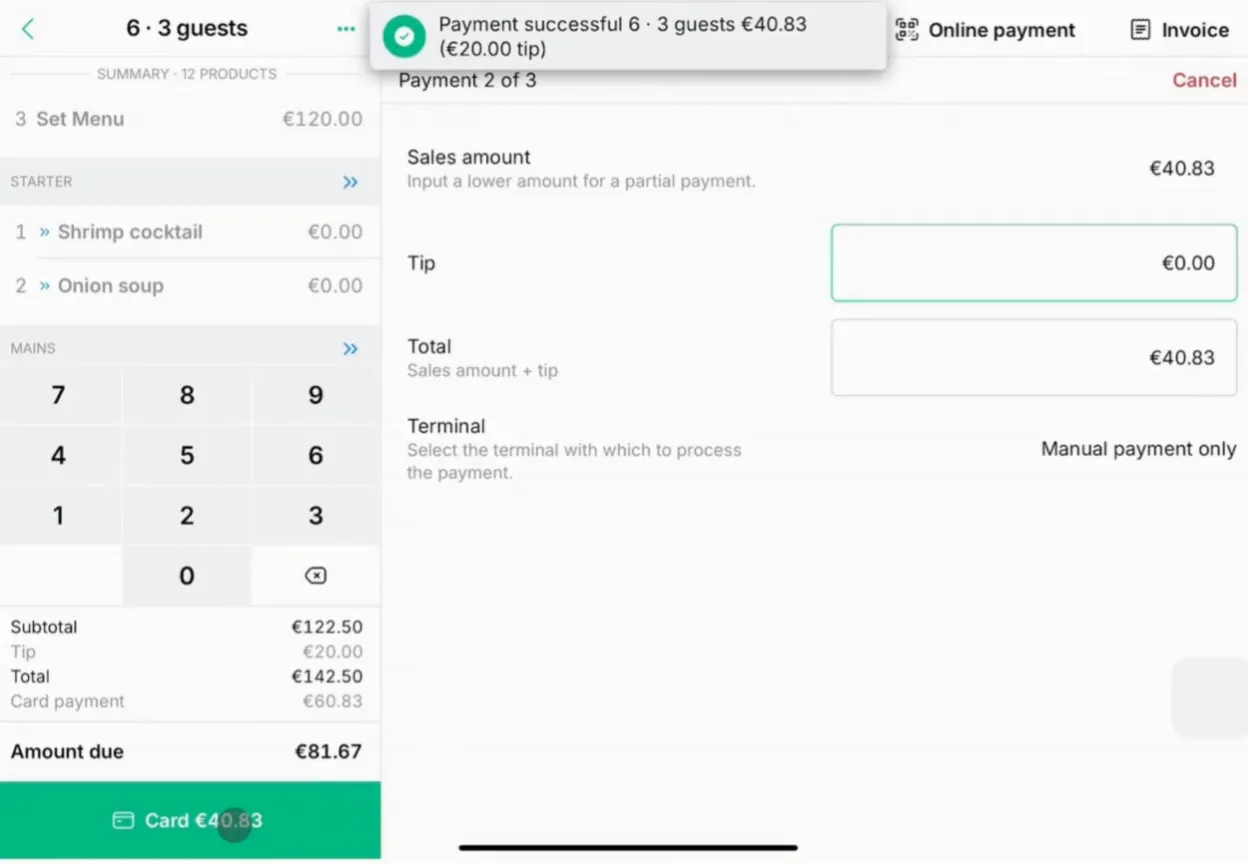
Step 7: Process payments
When guests are ready to pay, choose the payment method. If Quick Pay is enabled, a green button appears for the preferred payment option. For alternate payment methods, such as Cash, Invoice, Gift Cards, or others, select the three dots to view more choices. In this payment screen you can also see options like split payment or partial payment. Always confirm payment details and double-check that the correct amount is processed for each guest.
Tip: Splitting the bill is often needed in group settings. Tebi lets you divide the check and process each share individually, preventing mistakes and streamlining service.

Step 8: Close out the sale
After the final payment has gone through, Tebi updates the system, closes up the table, and stores the completed transaction in your records for future reference.
Step 9: Handle refunds and corrections
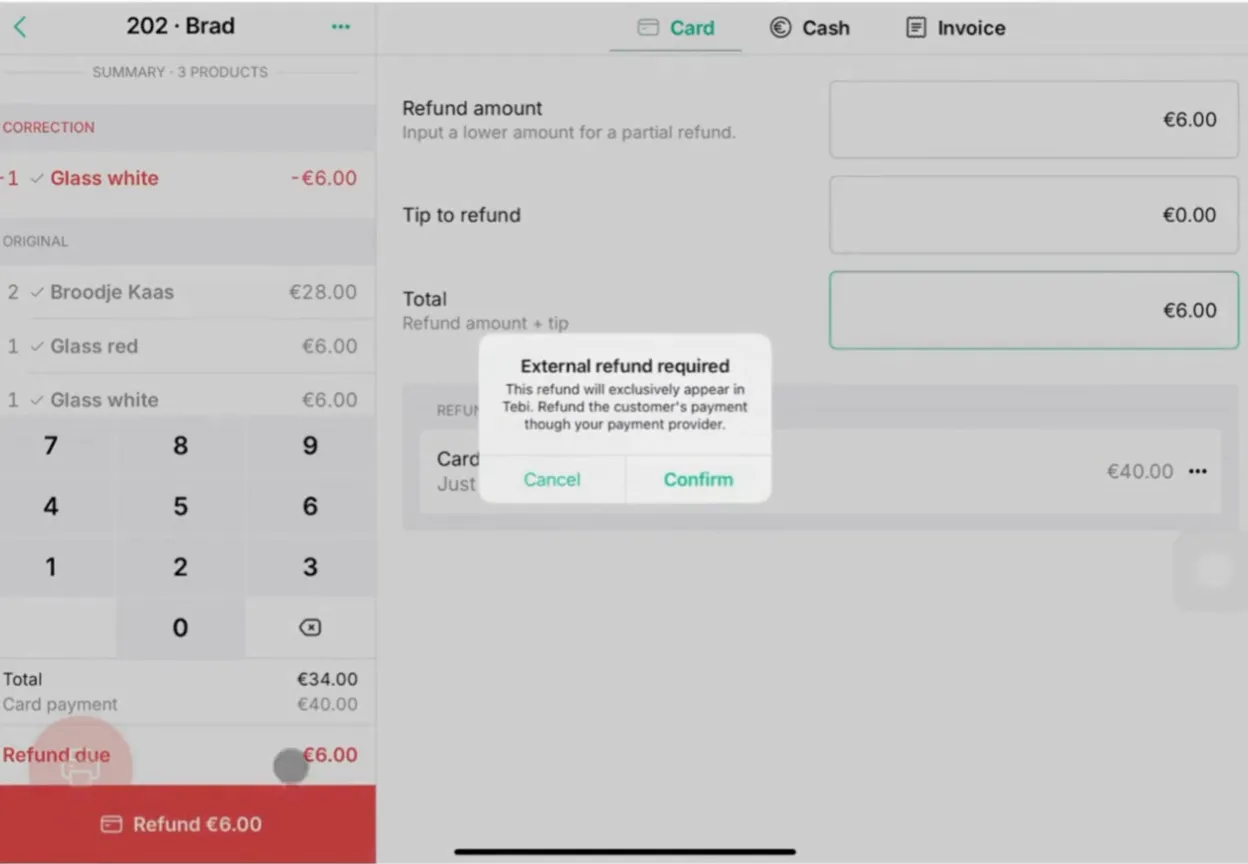
If you need to issue a refund, locate the sale in your list of closed transactions in the Sales List. Tap the three dots to open more options, choose Correct Sale, then select the specific products to refund and tap the bin icon. Confirm the action by tapping the refund button at the bottom of the screen.
Only users with team lead, manager and owner roles have authorization to process refunds or remove products from closed sales.
Helpful tips
- Review orders carefully before submitting to the kitchen or bar.
- Always double-check which user is logged in to ensure accountability.
- Use notes to minimize communication errors and speed up service.
- Only authorized users can process sensitive actions like discounts and refunds; contact a team lead, manager, or owner if you need assistance.
By following these steps, you’ll efficiently manage tables, orders, and payments—resulting in smoother service and fewer mistakes.