Setting up your reservation email and widget
In the Tebi Back Office, you can configure the design of your widget and the information that customers will receive when making a reservation.
Customize reservations email
Customize the appearance of your reservation email:
- Go to Reservations > Appearance
- Under confirmation email to guests:
- Fill in your Business details.
- Contact email and phone number: Set an email address where you will receive notifications about reservations such as new reservations, cancellations, and updates. Optional: A phone number that guests can reach you at.
- Specify your website: enter the website address on which you want the widget to appear.
- Turn toggle on to add a custom Google Maps link.
- Turn toggle on to include a custom message.
- Write out any additional information for in the confirmation email
- Turn toggle on to include a message for larger groups.
- Adjust the widget button label.
- When finished with filling in all your details, click Save changes.
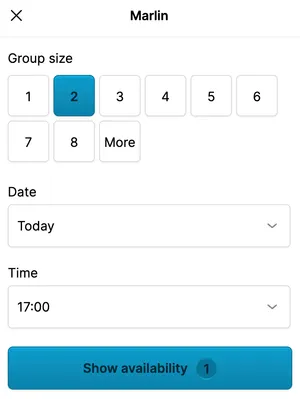
Set-up Tebi Reservation Widget
Appearance
For the appearance of the Tebi Reservations Widget:
- Go to Reservations > Appearance
- Pick a color for your widget
Website pop-up
Show a pop-up on your website to promote reservations, events and new services. Simple to set up and helps keep your customers informed about what’s happening at your business.
- Go to Reservations > Appearance > Website pop-up
- Enable the website pop-up by turning on the toggle
- Fill in a Title and Description.
- It is possible to use simple HTML (e.g. links or text styling in the description).
- Select one of the Button action options:
- No button: the pop-up will not show a button
- Open reservations widget: the button will open the reservation widget at the first available date for reservations
- Open reservations widget at a specific service: choose a service and the widget will open at the first available date and time for the service
Location selection
If you have a multi-location set-up:
- Go to Reservations > Widget
- Under Widget installation, click Select additional locations
- Choose from the drop down menu which locations to add into the reservation widget. The customer can select which location to create a reservation for.
- Go back to Reservations > Appearance to adjust how the location displays in the widget. Under Location selection, you can change:
- Change the Location name
- Add a Location description
- Add a Location image
Install the Tebi Widget
The Tebi widget code and details you can find in the Tebi Back Office via Reservations > Widget.
**Test widget (non-live environments only)
**If you would like to test the widget before going live on a website, you can click on the test widget link and test what you have set up for Reservations, QR takeaway and/or Gift Cards.
- Go to Reservations > Widget.
- Widget installation: This source code is necessary to install the widget on your website. Paste this snippet into the source code of your website.
- Optional custom links: Code to add custom links to your website to open the widget.
- Optional share link: link to share with guests. Also possible to embed the URL on your website.
- Optional Wordpress plugin: token to add on Wordpress.